This guide explains how to create user accounts in WordPress, assign roles, and manage permissions effectively.
Why Add Multiple Users?
If you’re new to WordPress, you might wonder why multiple user accounts are necessary. The main reason is security and convenience. For example, if you need to grant a developer access to your WordPress site, you shouldn’t share your personal admin credentials or your LyteHosting Customer Portal login. Instead, you can create a separate account with the appropriate role and permissions.
How to Create a New User in WordPress
Follow these steps to add a new user:
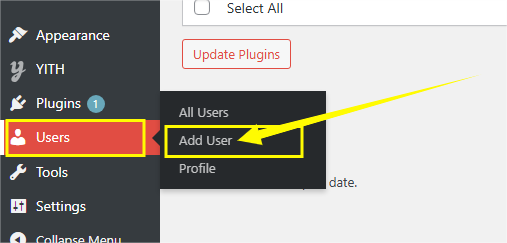
STEP 1: Log in to your WordPress Dashboard.
STEP 2: From the left-hand menu, click Users, then Add User.
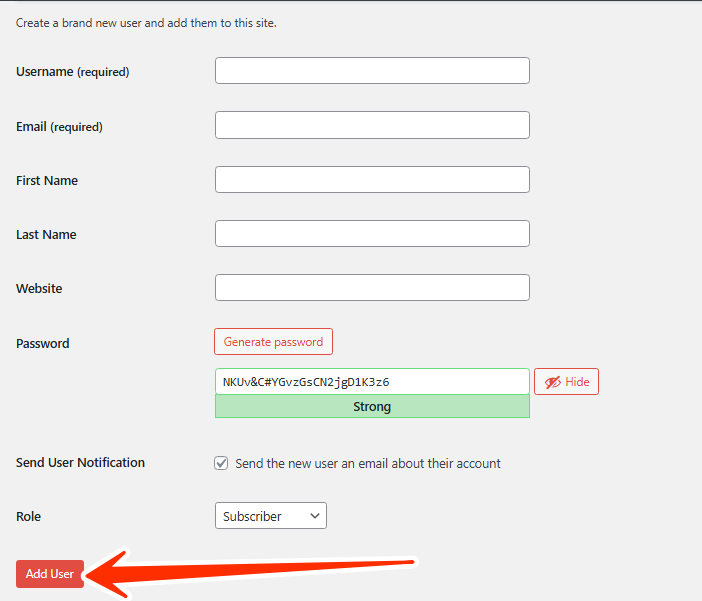
STEP 3: Fill in the required details:
- Username – The login name for the user.
- Email – Used for password resets and notifications.
- First & Last Name (optional) – Basic user details.
- Website (optional) – The user’s website if applicable.
- Password – Choose a strong, secure password.
- Send Password – Decide if the password should be emailed to the user.
- Role – Assign the correct role (explained below).
STEP 4: Click Add New User to save.
Understanding User Roles in WordPress
Assigning roles ensures users only have access to what they need. For instance, an author should not be able to install plugins, and an editor should not have administrator privileges.
Here are the available WordPress roles:
1. Administrator
- Full access to all site features and settings.
- Can manage users, install themes/plugins, edit posts/pages, and even delete the site.
- Only trusted individuals should have this role (ideally, just one admin per site).
2. Editor
- Can create, edit, publish, and delete any post or page (including those written by others).
- Manages comments, categories, tags, and links.
- Perfect for someone responsible for overall content management.
3. Author
- Can create, edit, publish, and delete only their own posts.
- Can upload media files but cannot manage pages or other users’ posts.
- Limited access compared to Editors.
4. Contributor
- Can write and edit their own posts but cannot publish them.
- Once a post is submitted, an Administrator must review and approve it.
- Cannot upload media files.
5. Follower (for public sites) / Viewer (for private sites)
- Follower: Receives updates when new posts are published. Can leave comments if allowed. Anyone can follow a public blog, but invitations can also be sent.
- Viewer: Applies to private sites. Viewers can only read content and leave comments if permitted. They must be specifically invited to access a private site.
Note: If your public blog becomes private, followers won’t automatically become viewers, you must invite them.
What to Do When a Developer’s Work is Complete
Once your developer has finished working on your website, it’s best to reduce their privileges or remove their account for security reasons.
To change a user’s role:
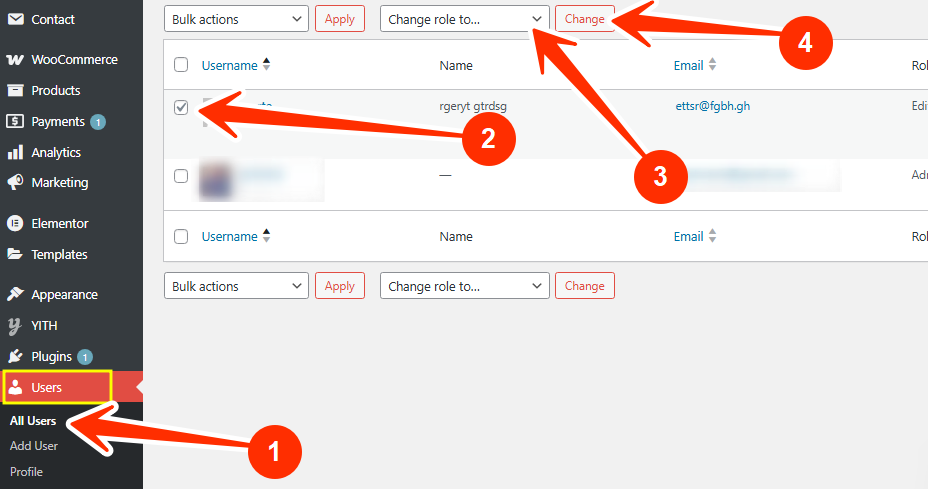
STEP 1: Log in to WordPress Dashboard.
STEP 2: Go to Users in the sidebar, and click on All Users.
STEP 3: Select the user you want to update.
STEP 4: Use the Change role to dropdown to assign a lower role.
STEP 5: Click Change to confirm.
By properly managing user accounts and roles, you keep your WordPress site secure while allowing teamwork and collaboration without exposing sensitive credentials.
If you need assistance, kindly reach out to our 24/7 Support Team.


