This content is for informational purposes only. Please be aware that LyteHosting does not provide direct support for WordPress themes.
WordPress is a powerful and flexible Content Management System (CMS), perfect for building websites—whether for business or personal projects. Its widespread popularity has led to the creation of countless themes, ranging from free to premium options.
What is a WordPress Theme?
A theme is a pre-built design template that determines the overall appearance and layout of your website. You can find themes directly from WordPress.org via your Dashboard or through reputable third-party sources.
Whether you're using a free or premium theme, there are two primary ways to add it to your site: through the WordPress Dashboard or by manually uploading the files.
Searching and Activating a Theme in WordPress
WordPress makes it easy to explore a variety of themes from its official repository. You can search based on keywords, features, or styles and activate the one that suits your site best.
To search and activate a theme:
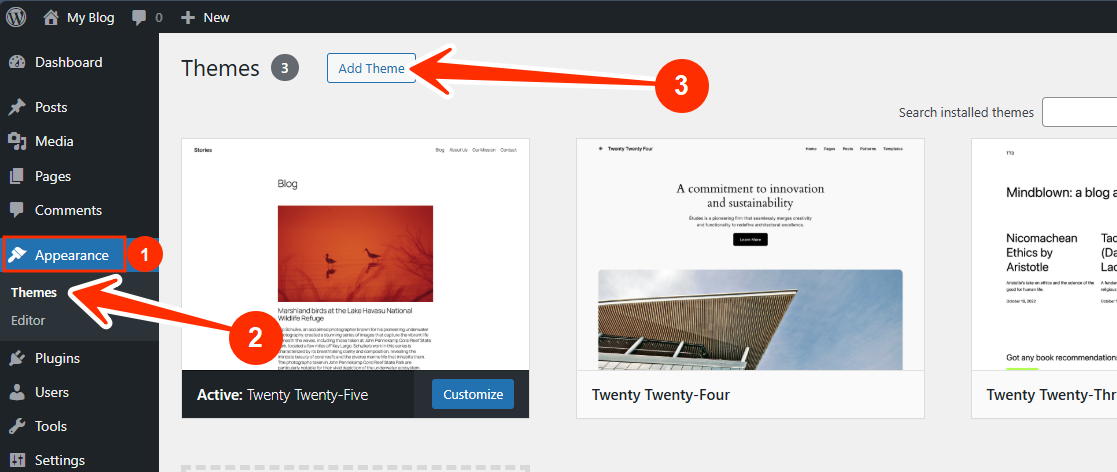
- Log in to your WordPress Dashboard.
- In the left menu, hover over Appearance and click Themes.
The Themes page displays all installed themes. You can only have one active theme at a time.
- To add a new theme, click Add New at the top or the Add New Theme block at the bottom.
- Browse available themes via the Popular, Latest, or Favorites tabs, or use the search bar to find a specific theme.
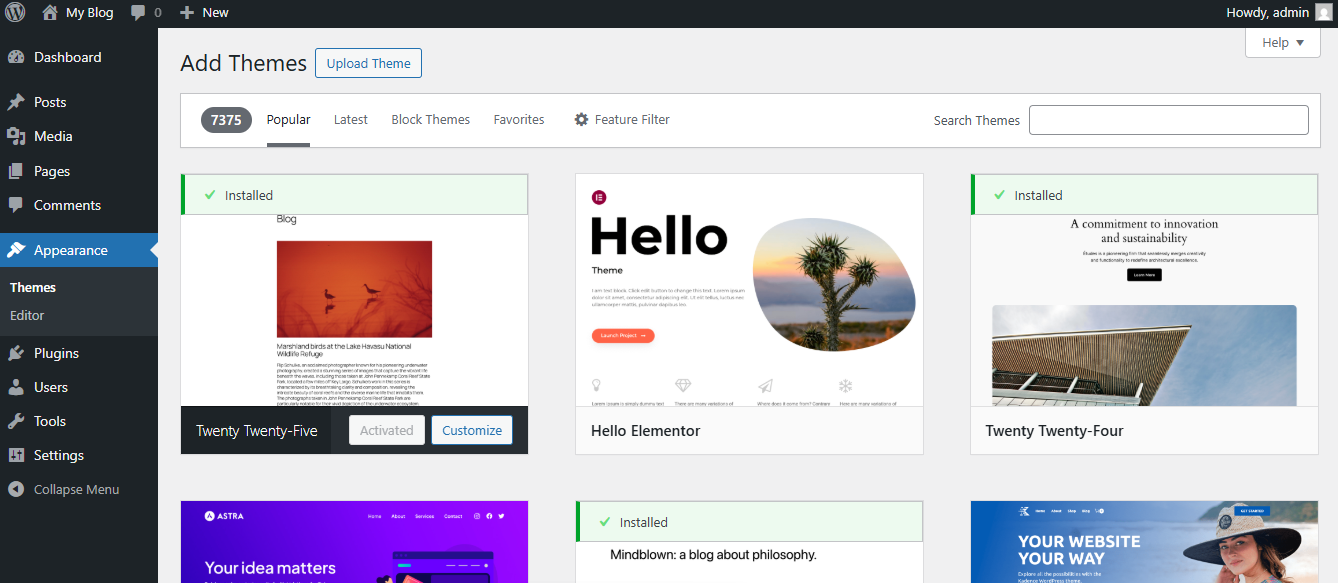
Many themes are available at no cost, with optional premium upgrades. You can filter themes by keyword, author, or tag.
To install and activate a theme:
- Hover over the theme thumbnail.
- Click Install to begin downloading.
- Preview the theme if you'd like to see how it looks.
- Once installed, click Activate to apply it to your site.
Downloading a WordPress Theme from Third-Party Sources
If you’ve found a stylish theme from an external website or purchased one from a developer, you’ll need to upload and activate it on your WordPress site.
Steps to follow:
- Download the theme’s .zip file from a trusted source.
- Make sure the file includes all necessary components.
- Check that the theme is compatible with your current WordPress version.
Uploading a WordPress Theme
If you obtained your theme from a third-party source, you’ll need to upload it to your WordPress Dashboard before activating it. You can do this in two ways:
1. Upload via WordPress Dashboard
Steps:
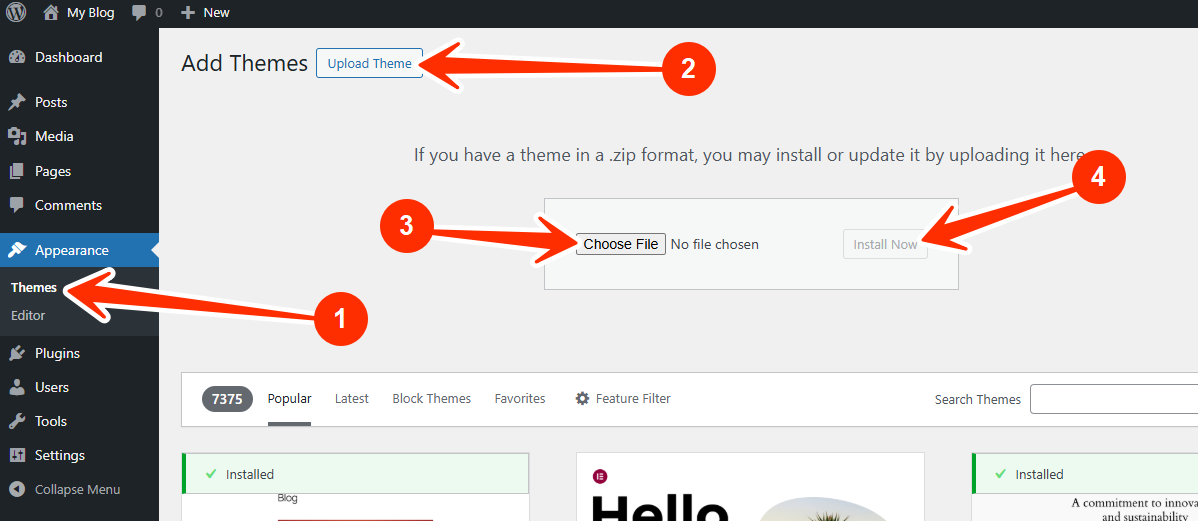
- Log in to your WordPress Dashboard.
- Go to Appearance > Themes.
- Click Upload Theme.
- Click Choose File and Install Now to upload the .zip file.
- After the installation completes, click Activate.
Note: If you encounter an error during upload, ensure the .zip file contains only the core theme files. Extra files may need to be removed beforehand.
2. Manual Upload via File Manager or FTP
If the Dashboard method doesn’t work, you can upload the theme files manually.
Steps:
- Access your website’s root directory via cPanel or an FTP client (like FileZilla).
- Navigate to the /wp-content/themes folder.
- Upload your theme’s .zip file.
- Extract the .zip file contents in the same directory.
- Log back into your WordPress Dashboard.
- Go to Appearance > Themes.
- Locate your new theme and click Activate.
Before making major changes like theme installations, it's wise to create a backup. With LyteHosting’s CodeGuard service, you can schedule automatic daily backups to keep your website safe and secure.


