What is the wp-content/uploads Directory?
The wp-content/uploads directory is where WordPress stores all media files such as images, videos, PDFs, and more. Every time you upload a file through the WordPress Media Library, it lands in this folder.
While this folder is meant only for static content (like .jpg and .png files), attackers often exploit it by uploading hidden PHP scripts disguised as images or media files. Once uploaded, they can execute these scripts to:
- Inject spam links.
- Redirect visitors to scam sites.
- Install backdoors.
- Gain full control of your website.
Why Do You Need to Secure the Uploads Folder?
Hackers typically scan your site for upload vulnerabilities. If they find a way in (via an outdated plugin or form), they’ll upload a malicious PHP file and trigger it remotely through the browser.
This is a common entry point for:
- Backdoors that give them long-term access.
- Phishing pages hidden in your server.
- Scripts that send spam emails from your domain.
- Defaced websites or redirects to harmful content.
The worst part? These scripts are often disguised with fake file names like image.php.jpg, so they can easily go unnoticed in your media library. That’s why disabling PHP execution in this folder is critical.
How to Apply This Security Fix Using WordPress Manager
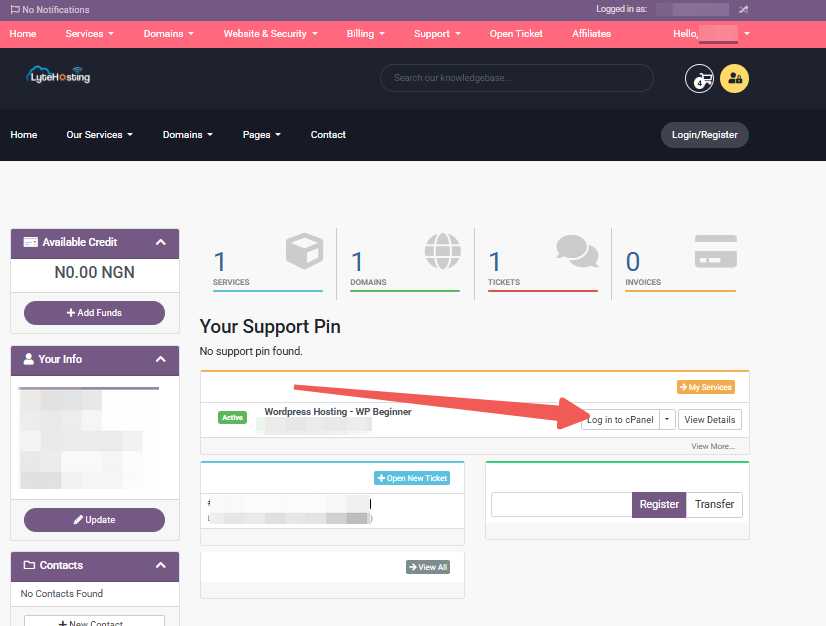
STEP 1: Log in to your cPanel.
There are three methods to log into your cPanel.
- Method 1: Log in to your cPanel directly.
- Method 2: Log in to your cPanel through your Customer Portal.
Through your Customer Portal;
- Log in to your Customer Portal.
- Click on "Log in to cPanel".
- Method 3: Log in using the details sent to your Email.
Through your Email;
- When you purchase a hosting plan, your cPanel login details (including username, password, and cPanel URL) are automatically sent to your registered email address. Simply check your inbox (or spam folder), locate the email, and use the provided credentials to access your cPanel.
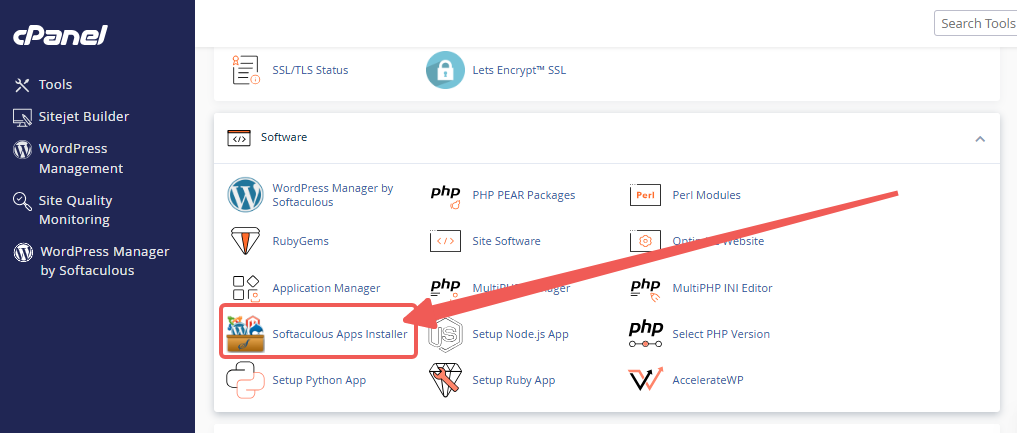
STEP 2: Locate the Software section and click on Softaculous Apps Installer.
STEP 3: Click the box for Installations.
An alternative is to select the “All Installations” icon from the menu in the upper-right corner.
![]()
STEP 4: Click the WordPress icon next to the installation you want to manage.
![]()
STEP 5: In WordPress Manager, select the website you want to secure.
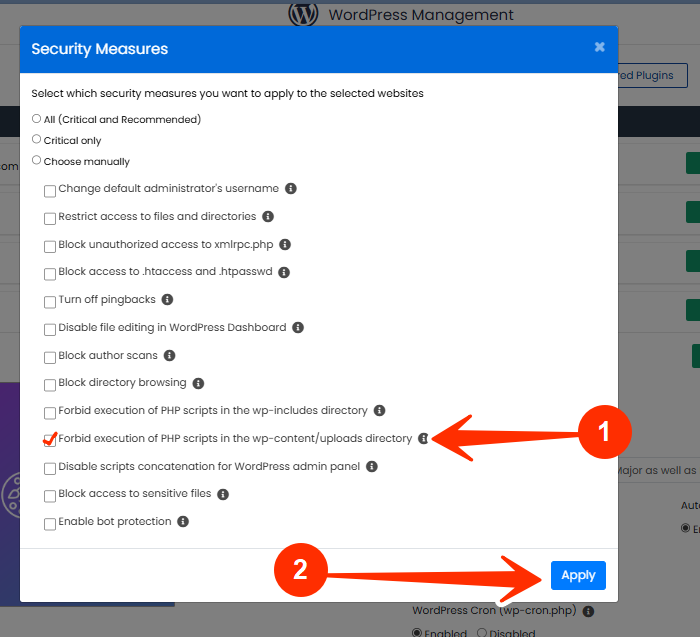
STEP 6: Scroll to the Security Measures section.
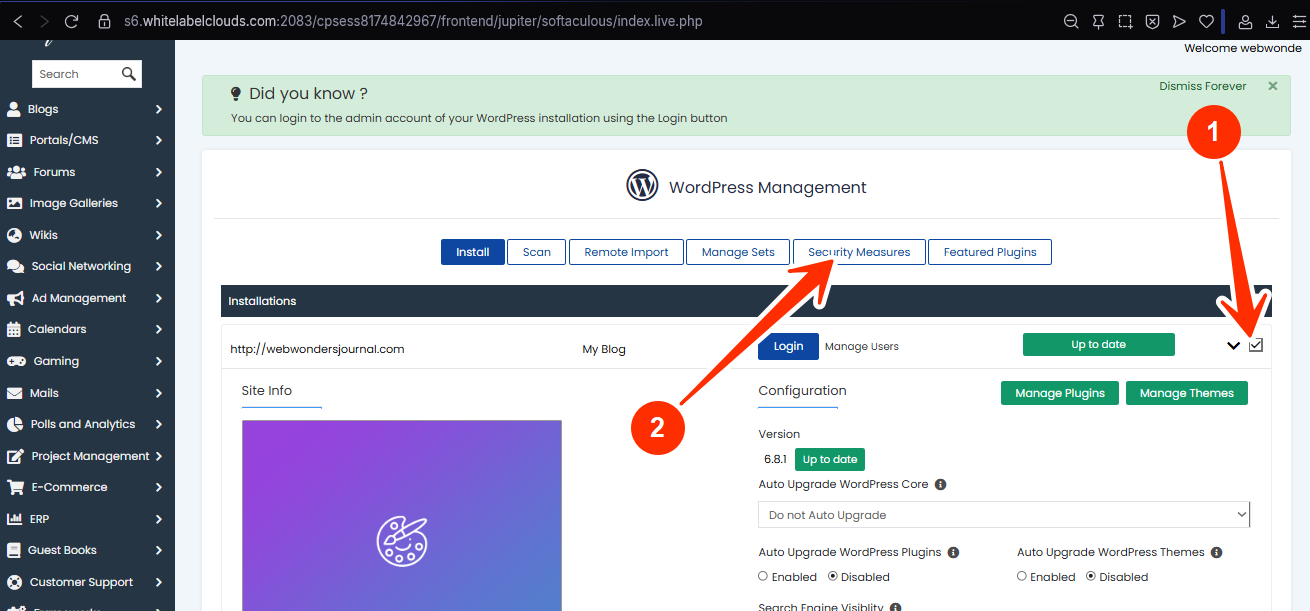
STEP 7: Checkmark the box for “Forbid execution of PHP scripts in the wp-content/uploads directory”, and click Apply.
What Happens When You Apply This?
Once applied, any PHP script uploaded to the uploads directory will be blocked from executing. That means even if a hacker manages to upload a file into that folder, they won’t be able to trigger it through the browser.
This doesn't affect your site’s performance or media functionality. You can still:
- Upload and display images, PDFs, videos.
- Use galleries or sliders.
- Access media through the dashboard.
What it does is shut down one of the most exploited backdoors used in WordPress attacks.
Frequently Asked Questions (FAQs)
Q: Will this stop me from uploading files?
Not at all. This only prevents .php scripts from running in that directory. You can still upload and serve media files normally.
Q: Can malware still get in another way?
Yes, which is why this measure should be combined with regular plugin updates, strong passwords, and a reliable firewall. But this step blocks one of the most abused entry points.
Q: How do I know if I’ve already been compromised?
You can scan your site using Wordfence, Sucuri, or ask LyteHosting’s support team to run a security check for you.
If you need help, kindly reach out to LyteHosting support.


