If you’re using LyteHosting for domain registration but want to build and host your website on Squarespace, you’ll need to configure your DNS settings manually. Unlike traditional web hosts, Squarespace does not provide nameservers, requiring users to manage their DNS through an external provider.
To successfully link your LyteHosting domain to Squarespace, follow this two-step process:
1. Access your cPanel and navigate to the Domains section.
2. Use the Zone Editor to modify your domain's existing DNS zone records.
This guide will walk you through the necessary steps to ensure a smooth connection between your LyteHosting domain and your Squarespace website.
NOTE:
- In the following examples, replace example.com with the actual domain name you want to redirect.
- When configuring the CNAME and A records, use the specific values provided by Squarespace. These records vary for each user and must match the details in your account.
- Some links below may direct you to your cPanel and its features, but access is only available under these conditions:
- You are logged into your Customer Portal (you can also log in after clicking the link).
- Your hosting plan is either Shared or Cloud.
This ensures a seamless process when updating your DNS settings for Squarespace.
STEP 1: Updating Your CNAME Record
Most domains already have a CNAME entry for www, which needs to be updated to point to ext-cust.squarespace.com. Follow these steps to modify your CNAME record:
1. Log in to cPanel.
There are three methods to log into your cPanel.
- Method 1: Log in to your cPanel directly.
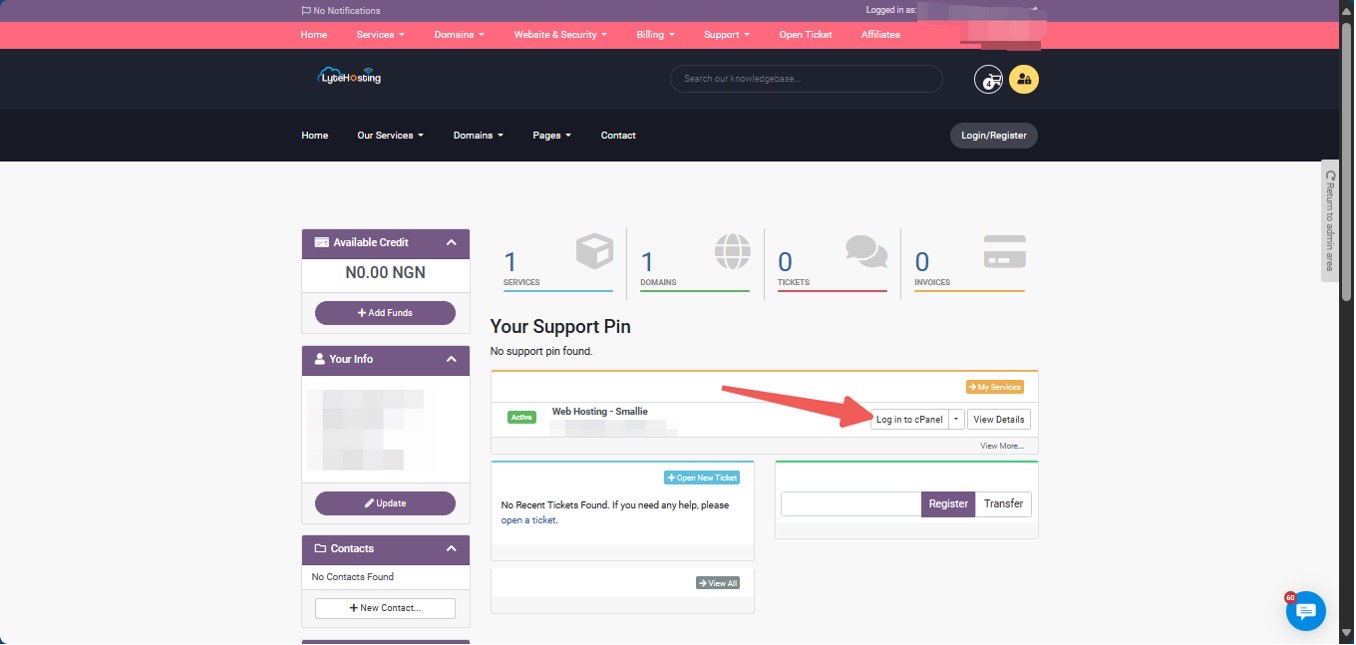
- Method 2: Log in to your cPanel through your Customer Portal.
Through your Customer Portal;
- Log in to your Customer Portal.
- Click on "Log in to cPanel".
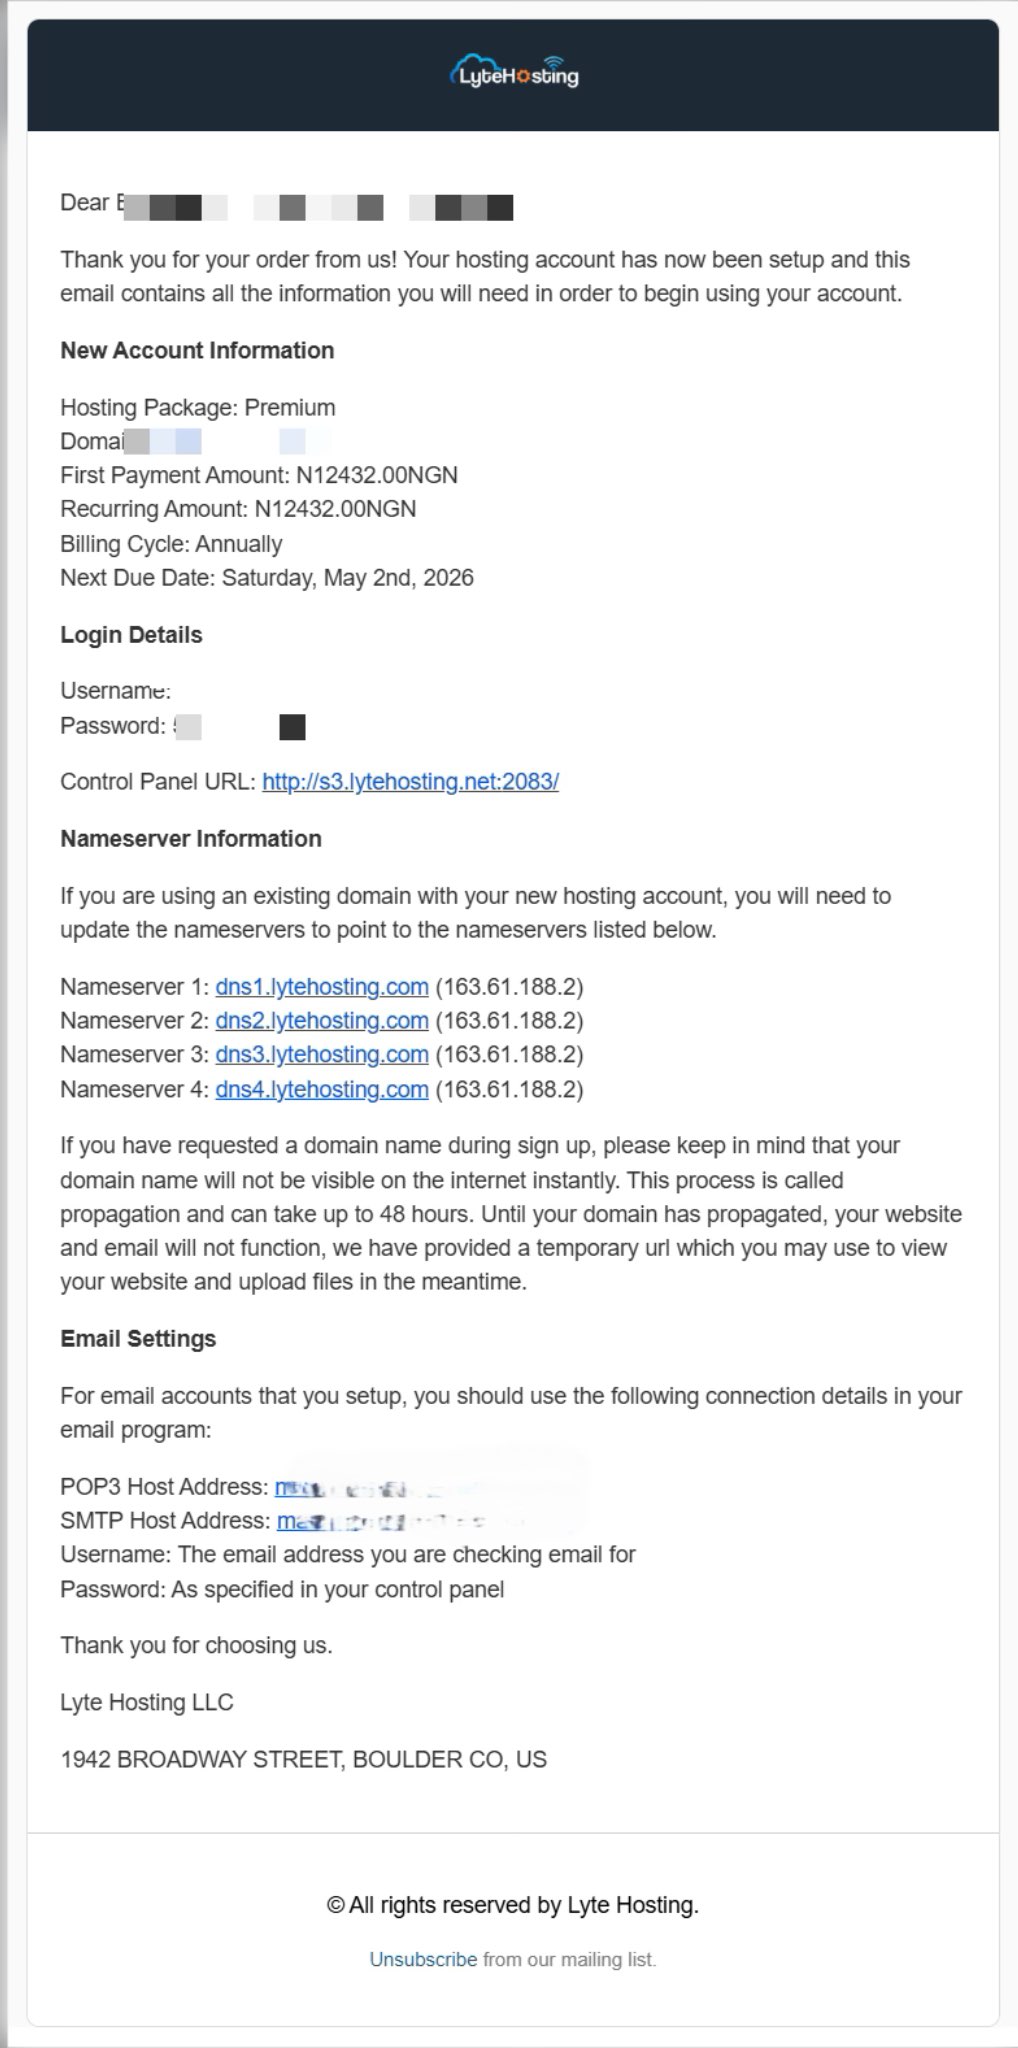
- Method 3: Log in using the details sent to your Email.
Through your Email;
- When you purchase a hosting plan, your cPanel login details (including username, password, and cPanel URL) are automatically sent to your registered email address. Simply check your inbox (or spam folder), locate the email, and use the provided credentials to access your cPanel.
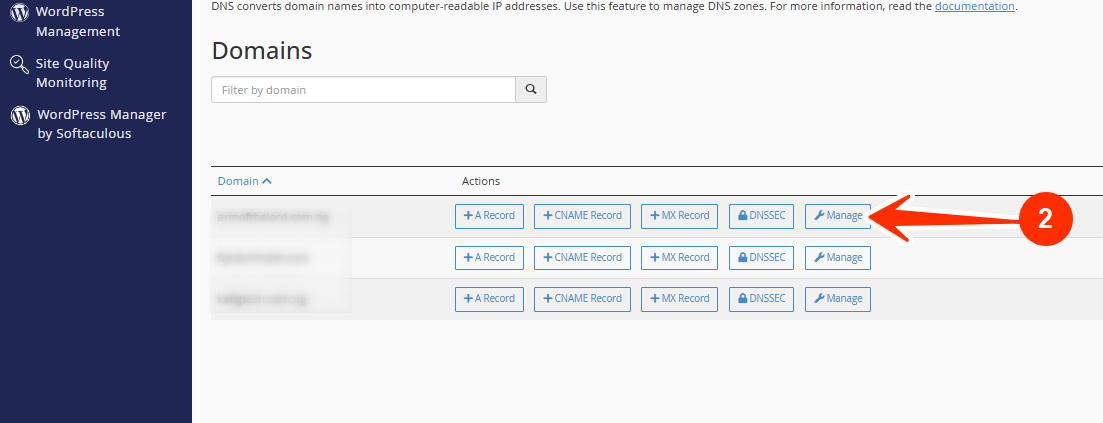
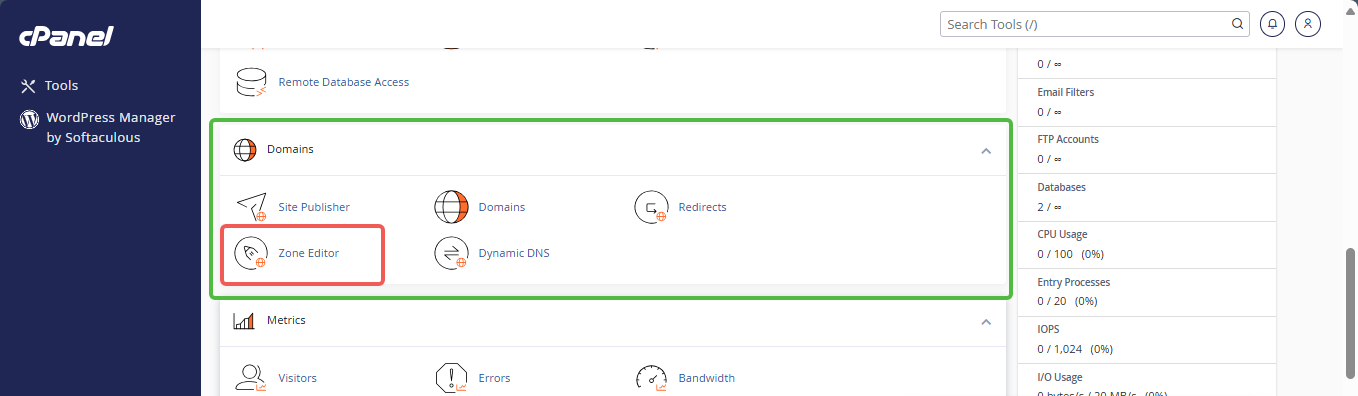
2. Go to the Domains section and select the Zone Editor.

3. Click Manage next to the domain you want to update.
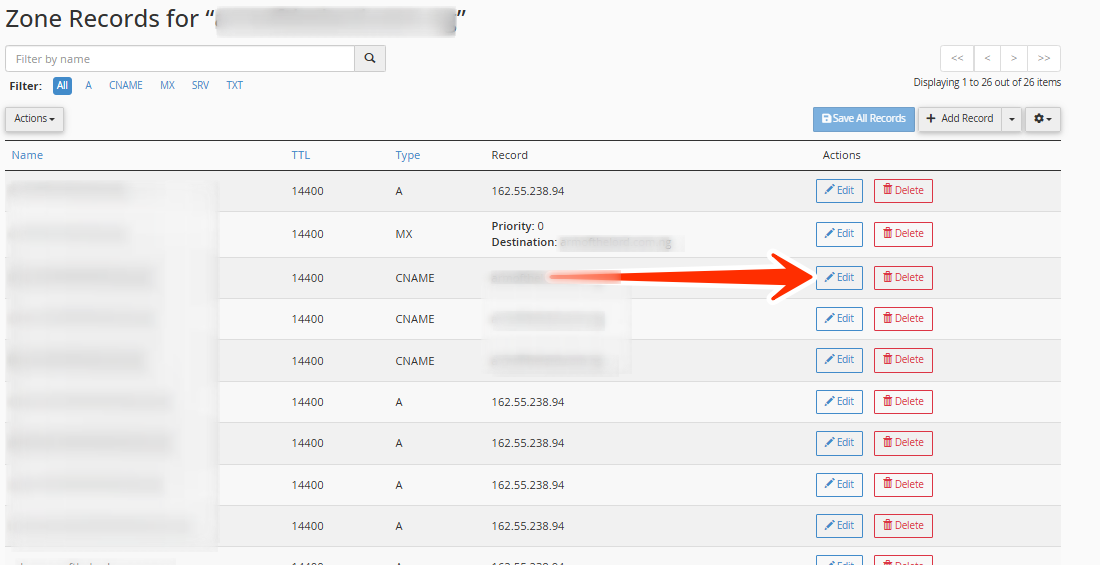
4. Find the www.example.com entry and click Edit.
5. Replace the existing CNAME value with the one provided by Squarespace (usually ext.squarespace.com) and click Save Record.
6. Your domain will now point to ext.squarespace.com.
This update ensures that visitors using "www.yourdomain.com" are directed to your Squarespace website.
STEP 2: Updating Your A Record(s)
To connect your LyteHosting domain to Squarespace, you need to update your A record(s) to point to the correct Squarespace IP address. Before proceeding, ensure that Squarespace has provided you with the necessary IP address(es).
Modifying Your A Record
1. Log in to cPanel (Refer to the steps above if you need guidance on accessing your cPanel.)
2. Navigate to the Domains section and click on the Zone Editor.

3. Click Manage next to the domain you want to update.

4. Locate the A record for your domain and click Edit.
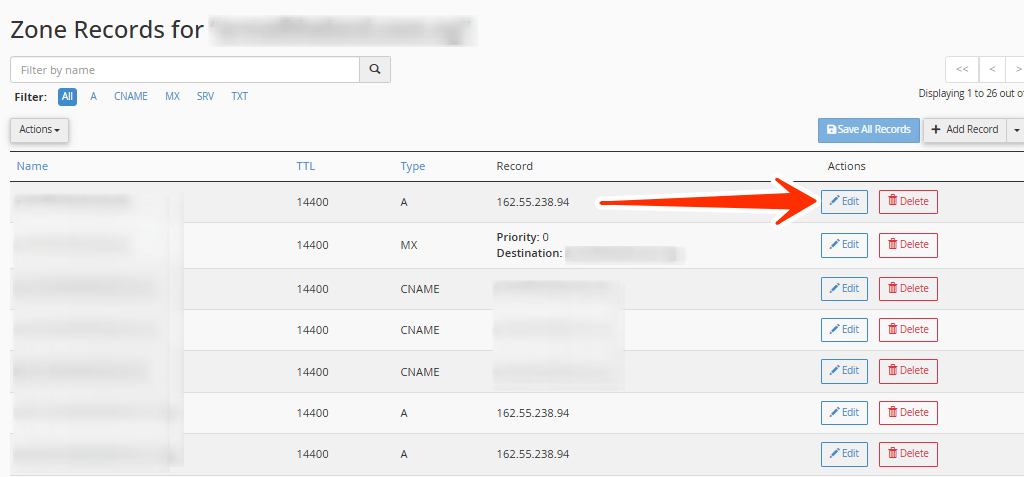
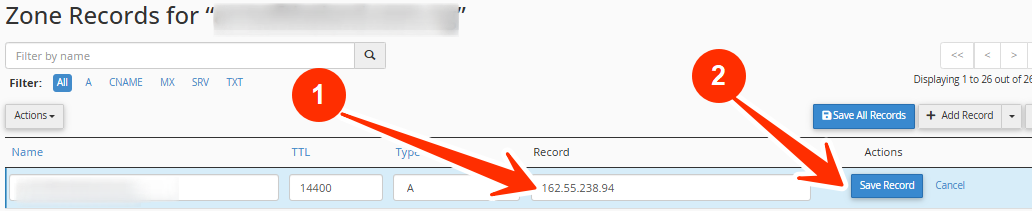
5. Replace the current IP address with the one provided by Squarespace.
6. Click Save Record to apply the changes.
Your domain will now point to Squarespace’s IP address. However, these changes may take some time to propagate across the internet.
Adding Multiple A Records (If Required)
Squarespace may provide up to four different IP addresses. If this is the case, follow these steps to add multiple A records:
1. Log in to cPanel (Refer to the steps above if you need guidance on accessing your cPanel.)
2. Navigate to the Domains section and open the Zone Editor.
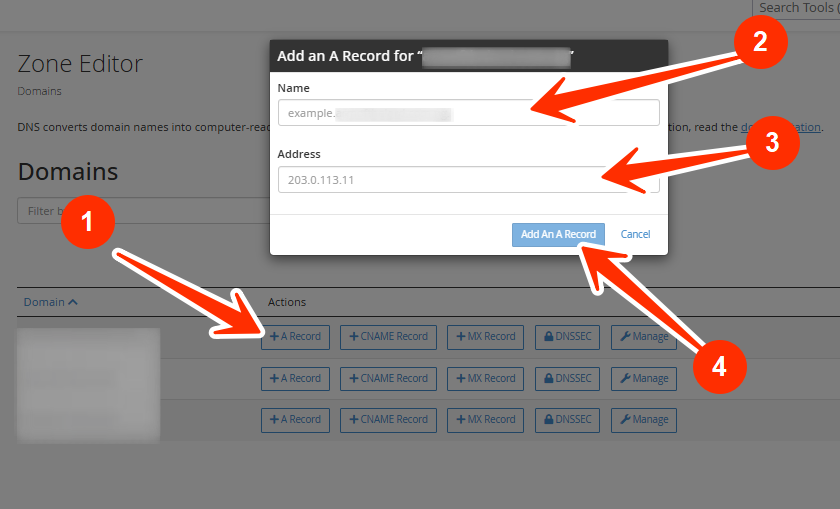
3. Click the + A Record button.
4. Enter the additional IP addresses provided by Squarespace in the pop-up box.
5. Repeat for each additional IP and click Add An A Record.
Removing Unnecessary A Records
If you have any extra A records that do not match the ones provided by Squarespace, you should delete them:
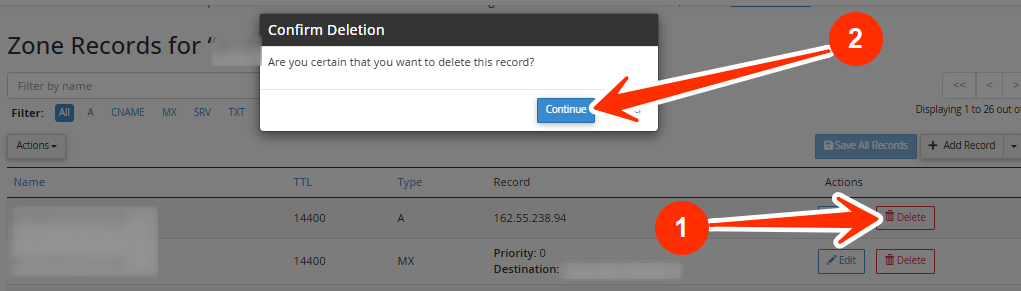
1. In the DNS Zone Editor, find the unwanted A record.
2. Click Delete and Continue to confirm the removal.
Propagation Time
It may take up to 8 hours for the changes to fully propagate. During this time, your site may not be immediately accessible. If you encounter issues, refer to Squarespace’s official support documentation for additional guidance.


