There are two primary methods to install a WordPress plugin through the WordPress dashboard: using the plugin search feature or uploading the plugin directly. Alternatively, you can manually install the plugin by placing it in the plugins folder of your WordPress site through FTP.
NOTE: LyteHosting strongly advises creating a full cPanel backup before making any major changes to prevent data loss.
How to Install a WordPress Plugin via the Dashboard
There are two ways to install and activate WordPress plugins.
Option 1: Using the WordPress Admin Plugin Search
STEP 1: Log into your WordPress Admin Panel.
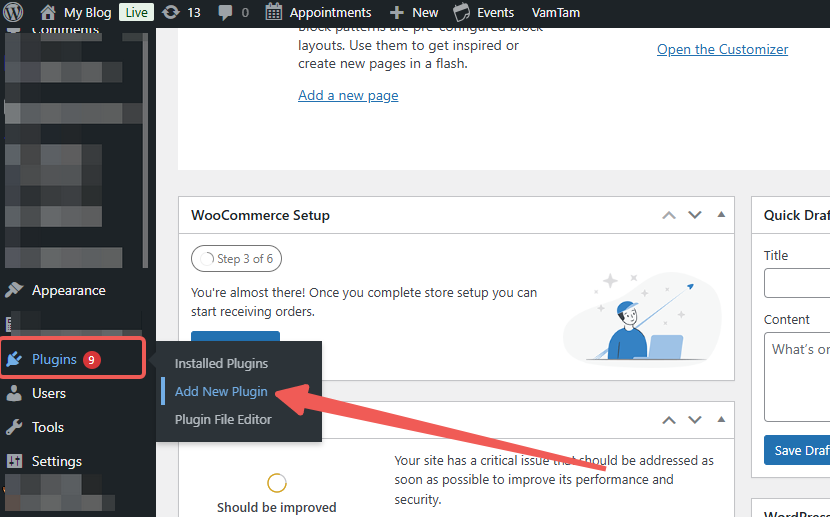
STEP 2: From the left-hand menu, click on Plugins, then choose Add New Plugin.

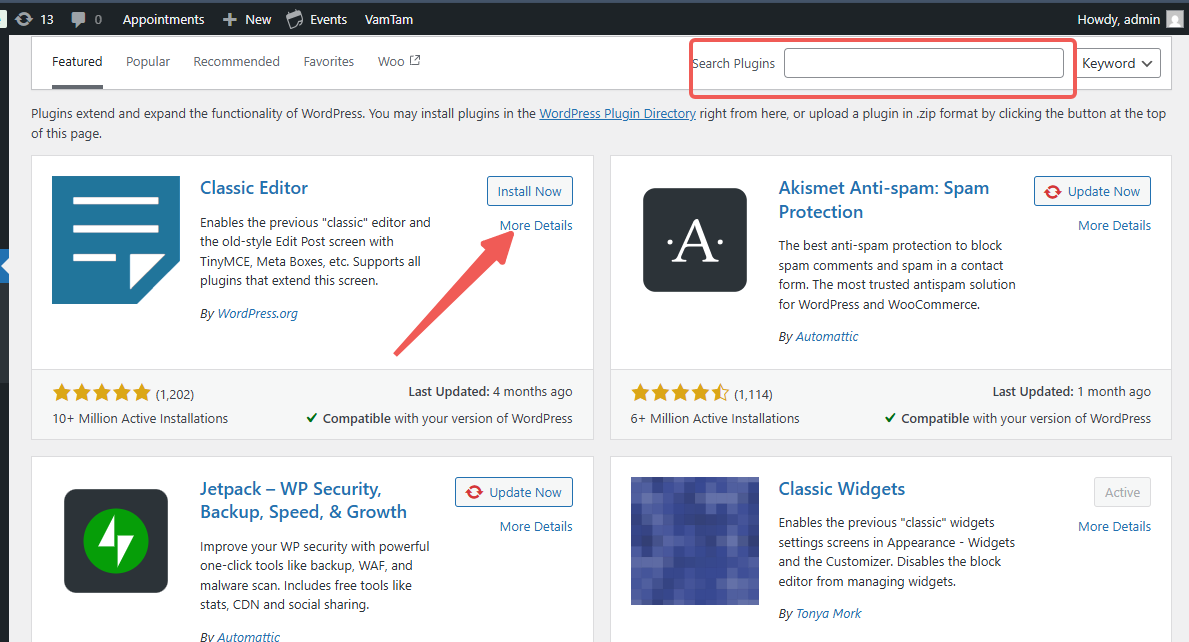
STEP 3: In the Search field, enter the name of the WordPress plugin you're looking for. To refine your search, you can select options from the Keyword dropdown and enter a descriptive keyword, author, or tag. Alternatively, you can use the Categories tabs—Featured, Popular, Recommended, or Favorites—to find your desired plugin.
STEP 4: After finding your plugin, navigate to Classic Editor and click on More Details to view additional information and setup instructions. You can save or print these instructions if needed.
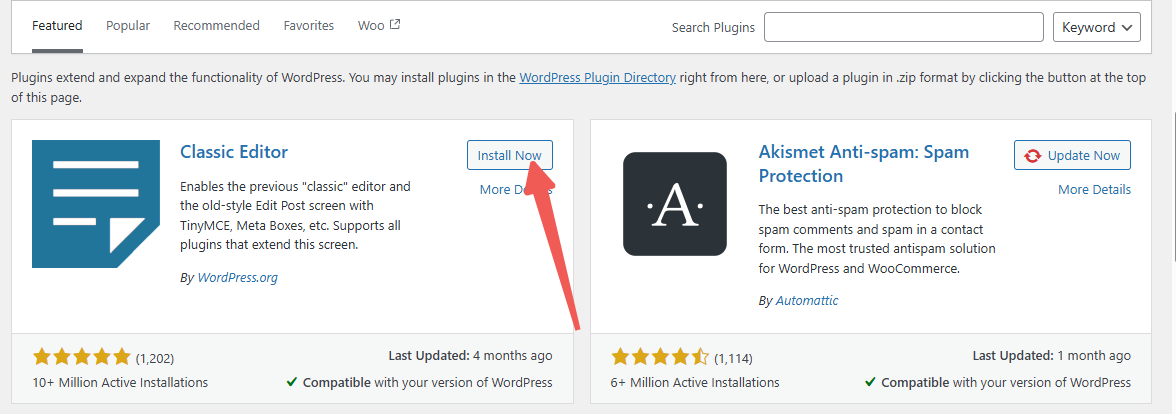
STEP 5: Click Install Now to begin downloading and installing the plugin.
STEP 6: The tab will show an "Installing" status while the plugin is being installed.
STEP 7: Once the installation is complete, the button will change to Activate.
STEP 8: Click Activate.
After activation, some plugins may redirect you to the Installed Plugins page or open a new tab for setup or usage of the plugin.
Option 2: Uploading a WordPress Plugin via the Admin Dashboard
Some plugins, particularly premium ones, are provided in a .zip file. To install these plugins, ensure you obtain the full set of core files from a trusted source. You will need to upload the .zip file directly into your WordPress admin area and then activate it from the dashboard.
STEP 1: In your WordPress dashboard, click on Plugins in the left menu, then select Add New Plugin.
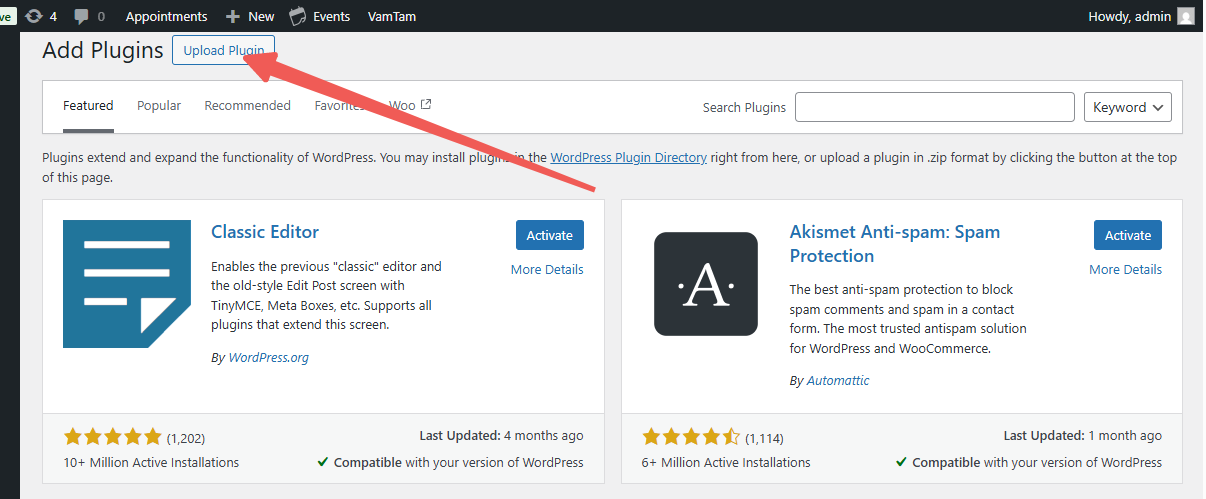
STEP 2: At the top of the page, click the Upload Plugin button.
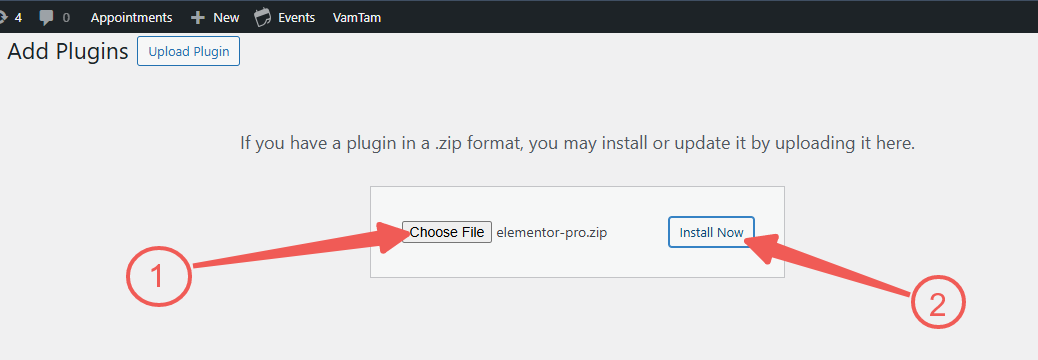
STEP 3: The upload form will appear. Click Choose File and select the plugin's .zip file.
STEP 4: After selecting the file, click Install Now.
STEP 5: WordPress will begin the upload and installation process. Once done, you’ll see a status message with options to Activate Plugin and Return to Plugin Installer.
STEP 6: Click Activate Plugin to start using it.
You may need to adjust or configure specific settings within the plugin depending on the requirements of your website. The settings can differ for each plugin.


