If you want the same database user to access the renamed database in cPanel, you need to record the username already associated with the database. This username may or may not be the same as the current database's name.
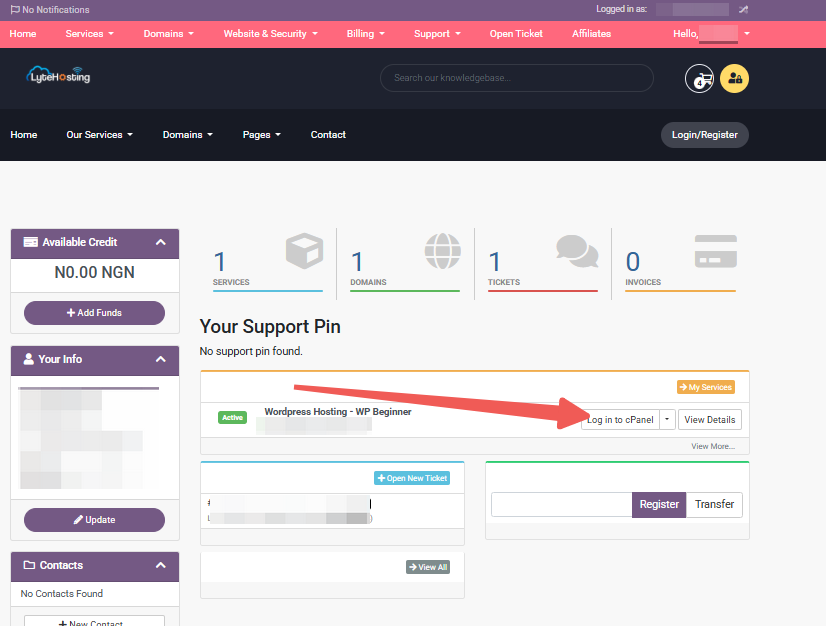
STEP 1: Log in to cPanel.
There are three methods to log into your cPanel.
- Method 1: Log in to your cPanel directly.
- Method 2: Log in to your cPanel through your Customer Portal.
Through your Customer Portal;
- Log in to your Customer Portal.
- Click on the "Log in to cPanel".
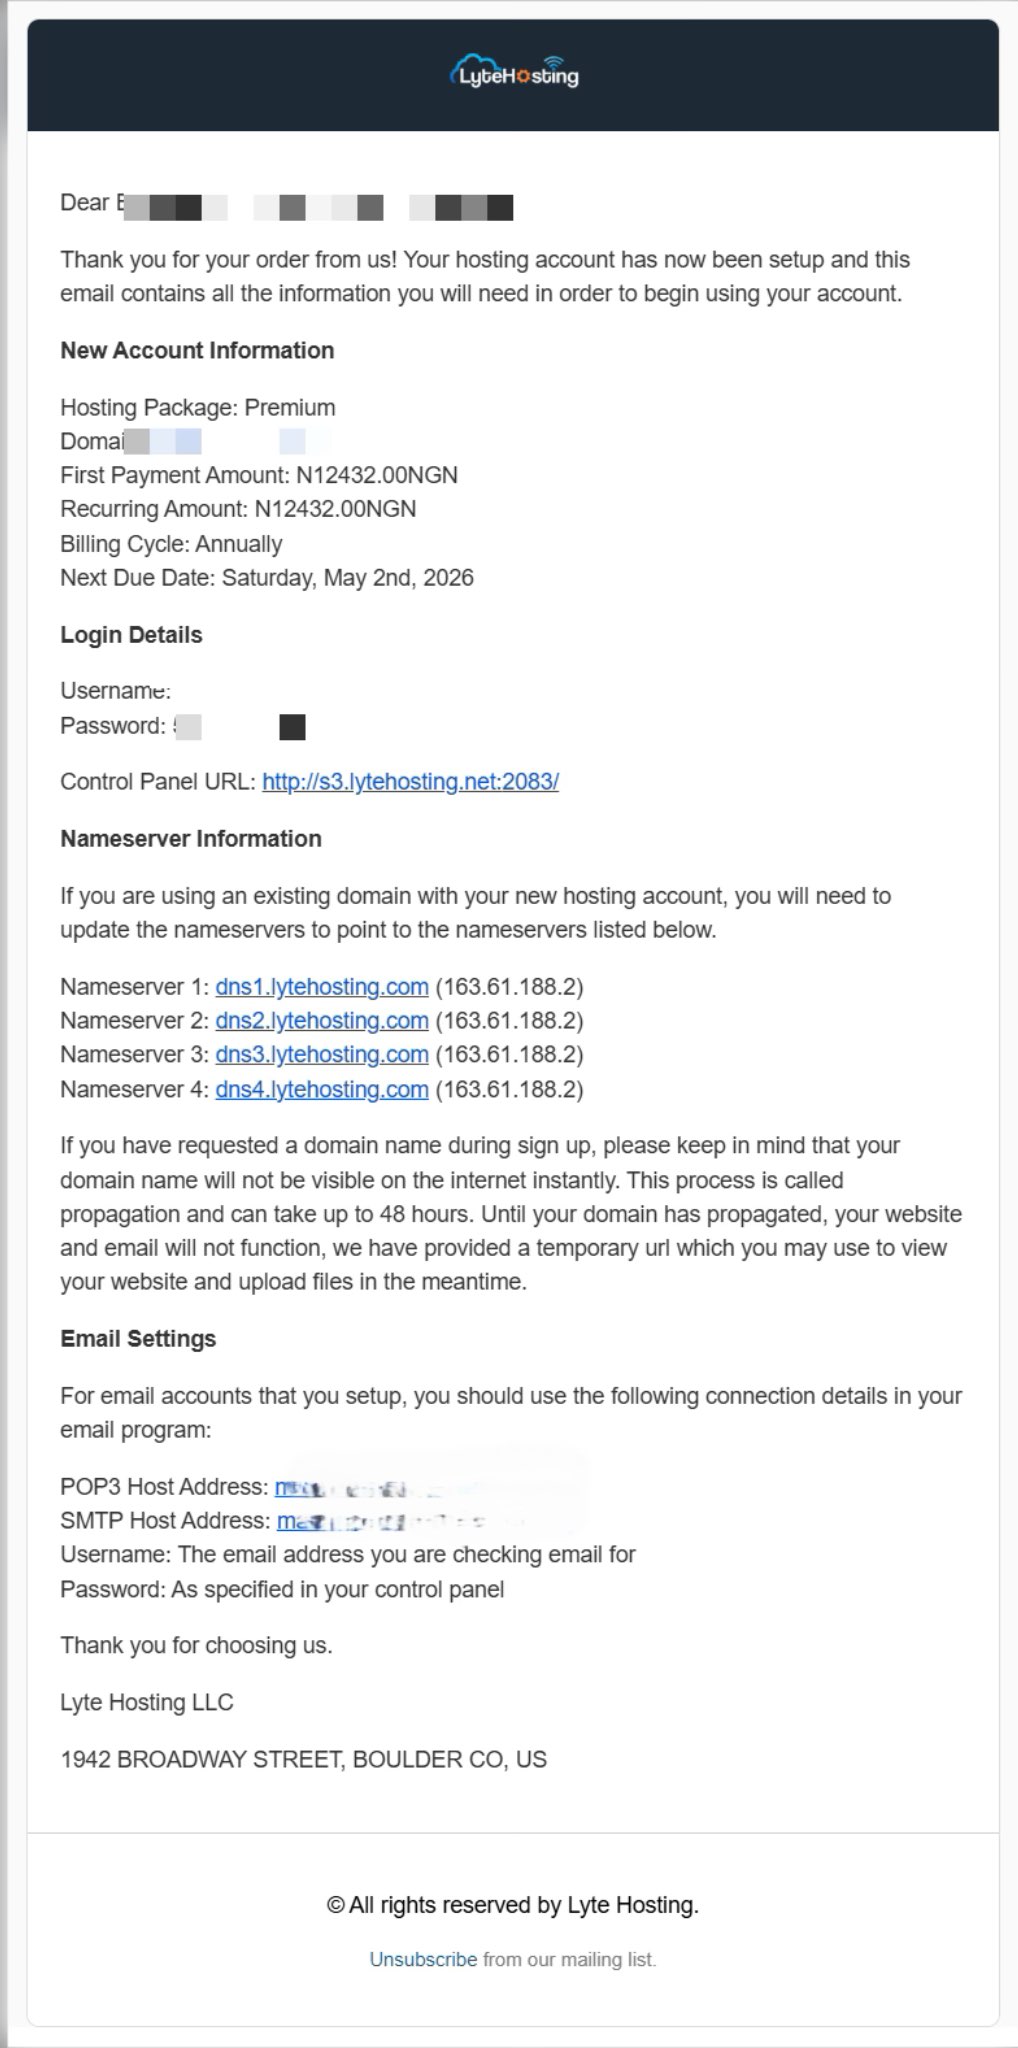
- Method 3: Log in using the details sent to your Email.
Through your Email;
- When you purchase a hosting plan, your cPanel login details (including username, password, and cPanel URL) are automatically sent to your registered email address. Simply check your inbox (or spam folder), locate the email, and use the provided credentials to access your cPanel.
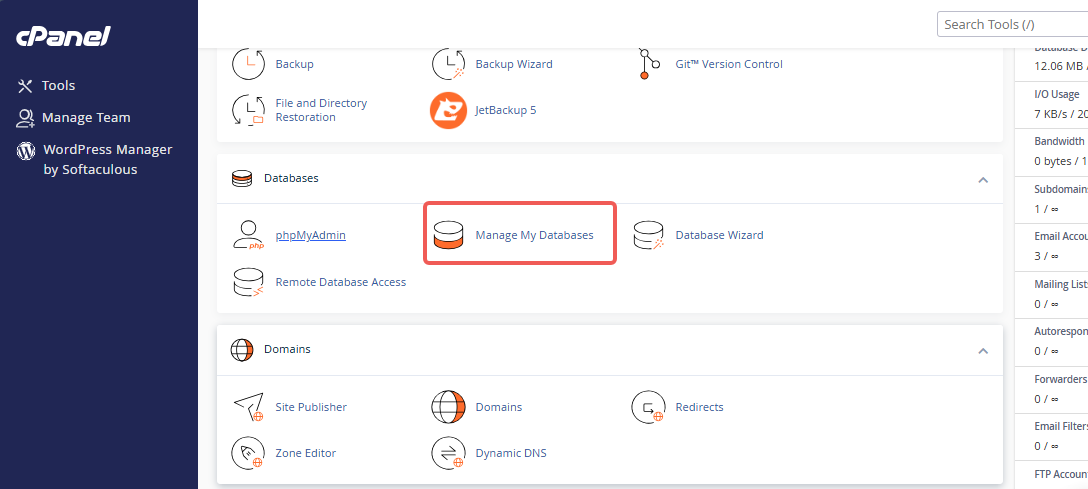
Under the Databases section, click on Manage My Databases.

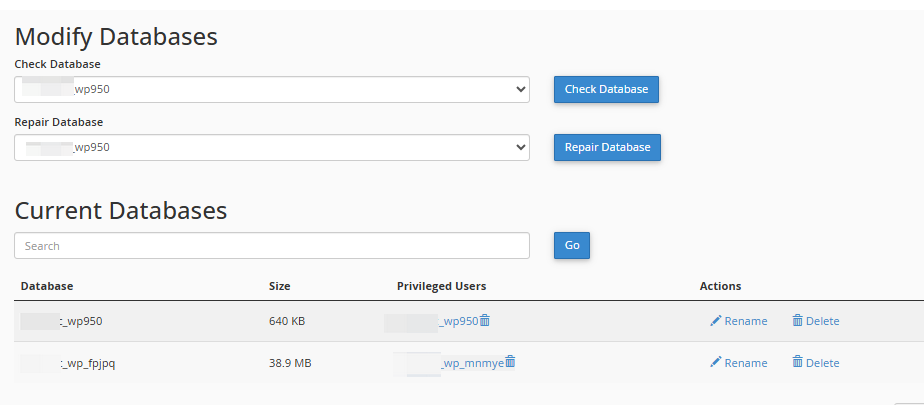
Go to the Current Databases section of the page.
- Locate the database you want to rename, and make a note of or recall the user that has already been allocated to it. This will be needed in step 3.
Go back to the cPanel home page to proceed with the next step.
STEP 2: Changing the Database Name
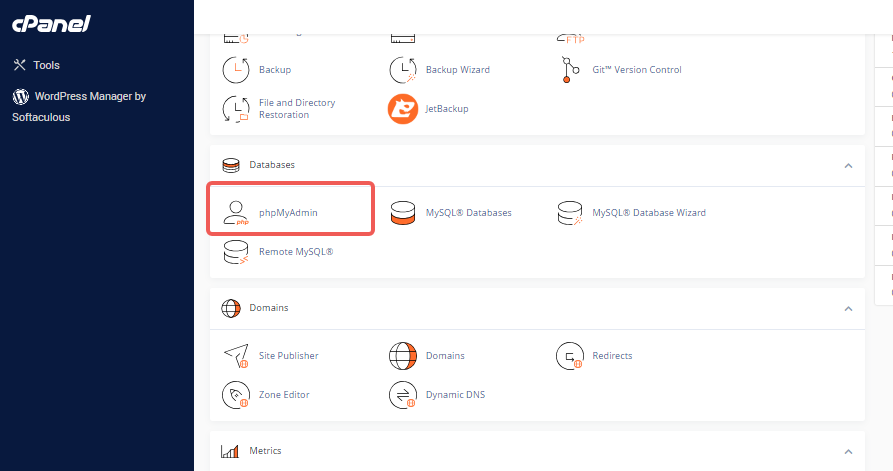
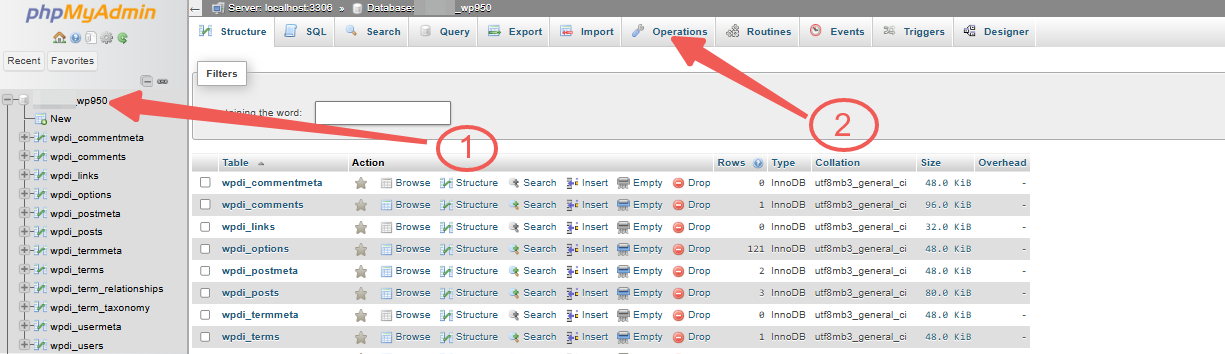
In cPanel, select phpMyAdmin under the Databases.
On the left-side column, select the database you want to rename.
Click the Operations.
Where “Rename database to:” is written. Put the new database name here.
Click the ‘Go’ option.
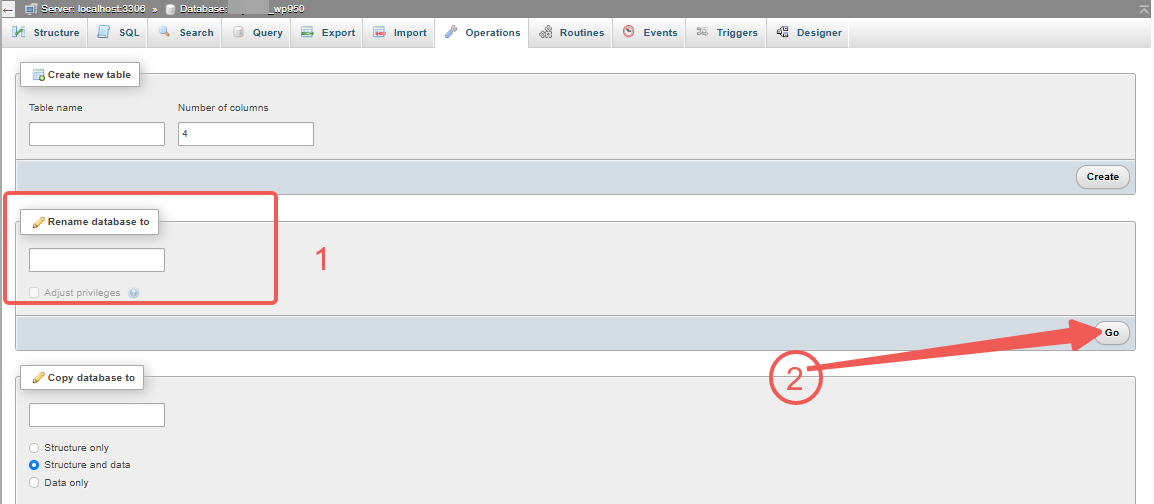
When prompted to build a new database and delete the old one, select ‘OK’ to continue. You should check that you spelled the new name correctly.
Click ‘OK’ when prompted to reload the database after the process is finished.
STEP 3: Changing User Permissions
You will need to change user permissions if your hosting plan supports cPanel.
Go back to the cPanel home page.
Under the Databases section, click on MySQL Databases.
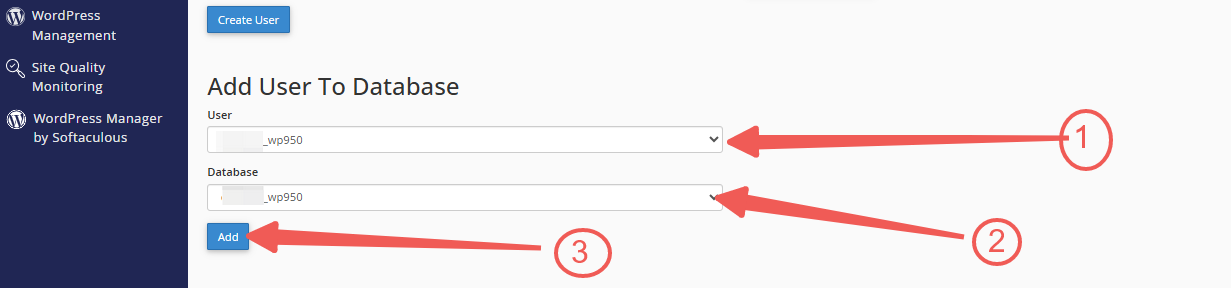
Navigate to the ‘Add User To Database section’.
From the list, pick the User (the same user who was previously connected to this database).
From the list, choose the Database (it should be the new name).
Click the ‘Add’ option.
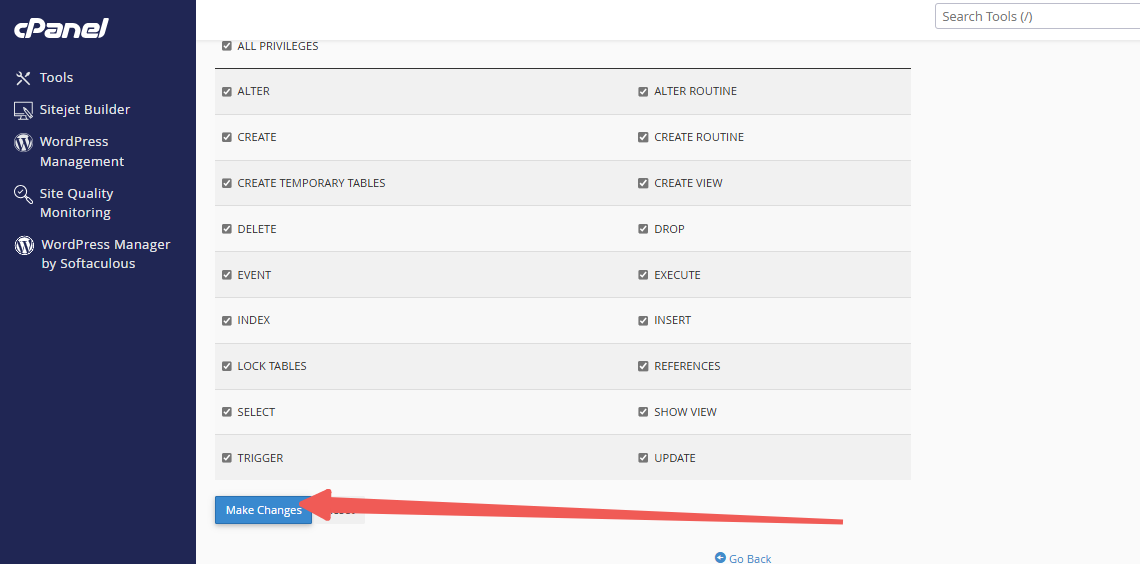
Check the ‘All Privileges’ box on the ‘Manage User Privileges’ page.
Click the ‘Make Changes’ option.
STEP 4: Modify the scripts
The name of this database has changed, so if you want scripts or applications that use it to stay accessible, you might need to update them.


