To view PHP configuration details for an addon domain, you can create a phpinfo.php file. Follow the steps below to generate and access this file for your addon domain.
STEP 1: Log in to cPanel.
There are three methods to log into your cPanel.
- Method 1: Log in to your cPanel directly.
- Method 2: Log in to your cPanel through your Customer Portal.
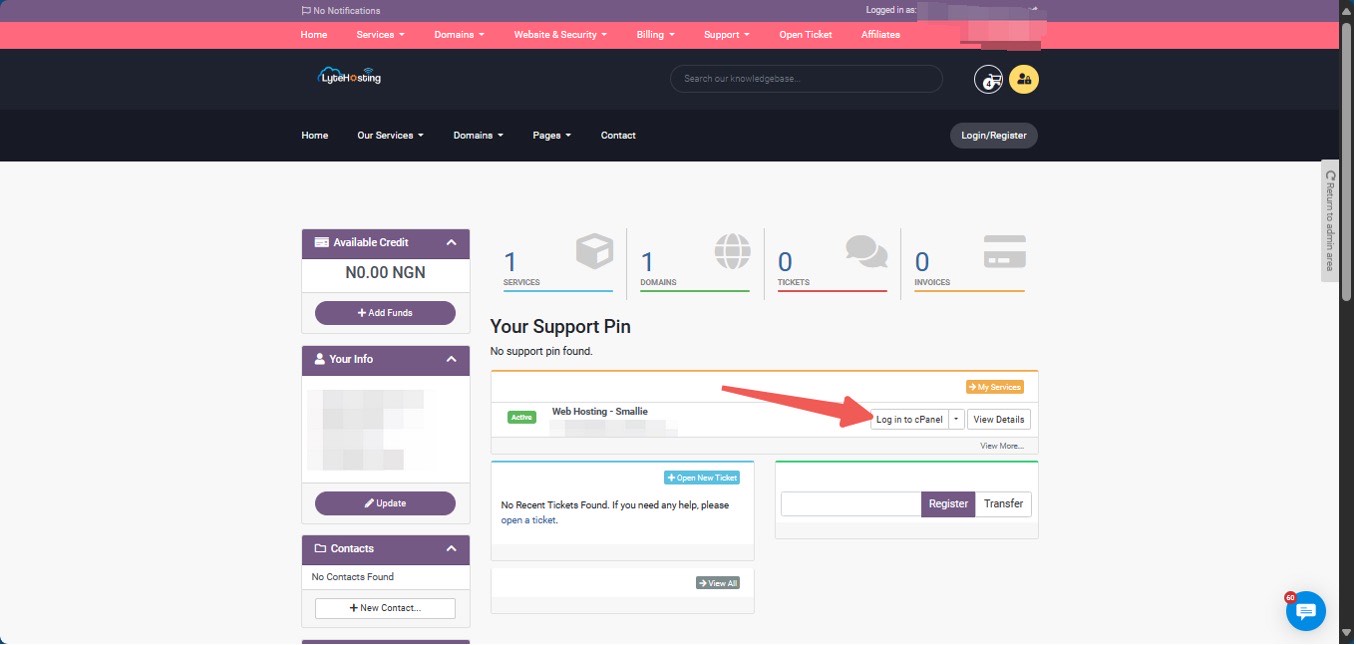
Through your Customer Portal;
- Log in to your Customer Portal.
- Click on "Log in to cPanel".
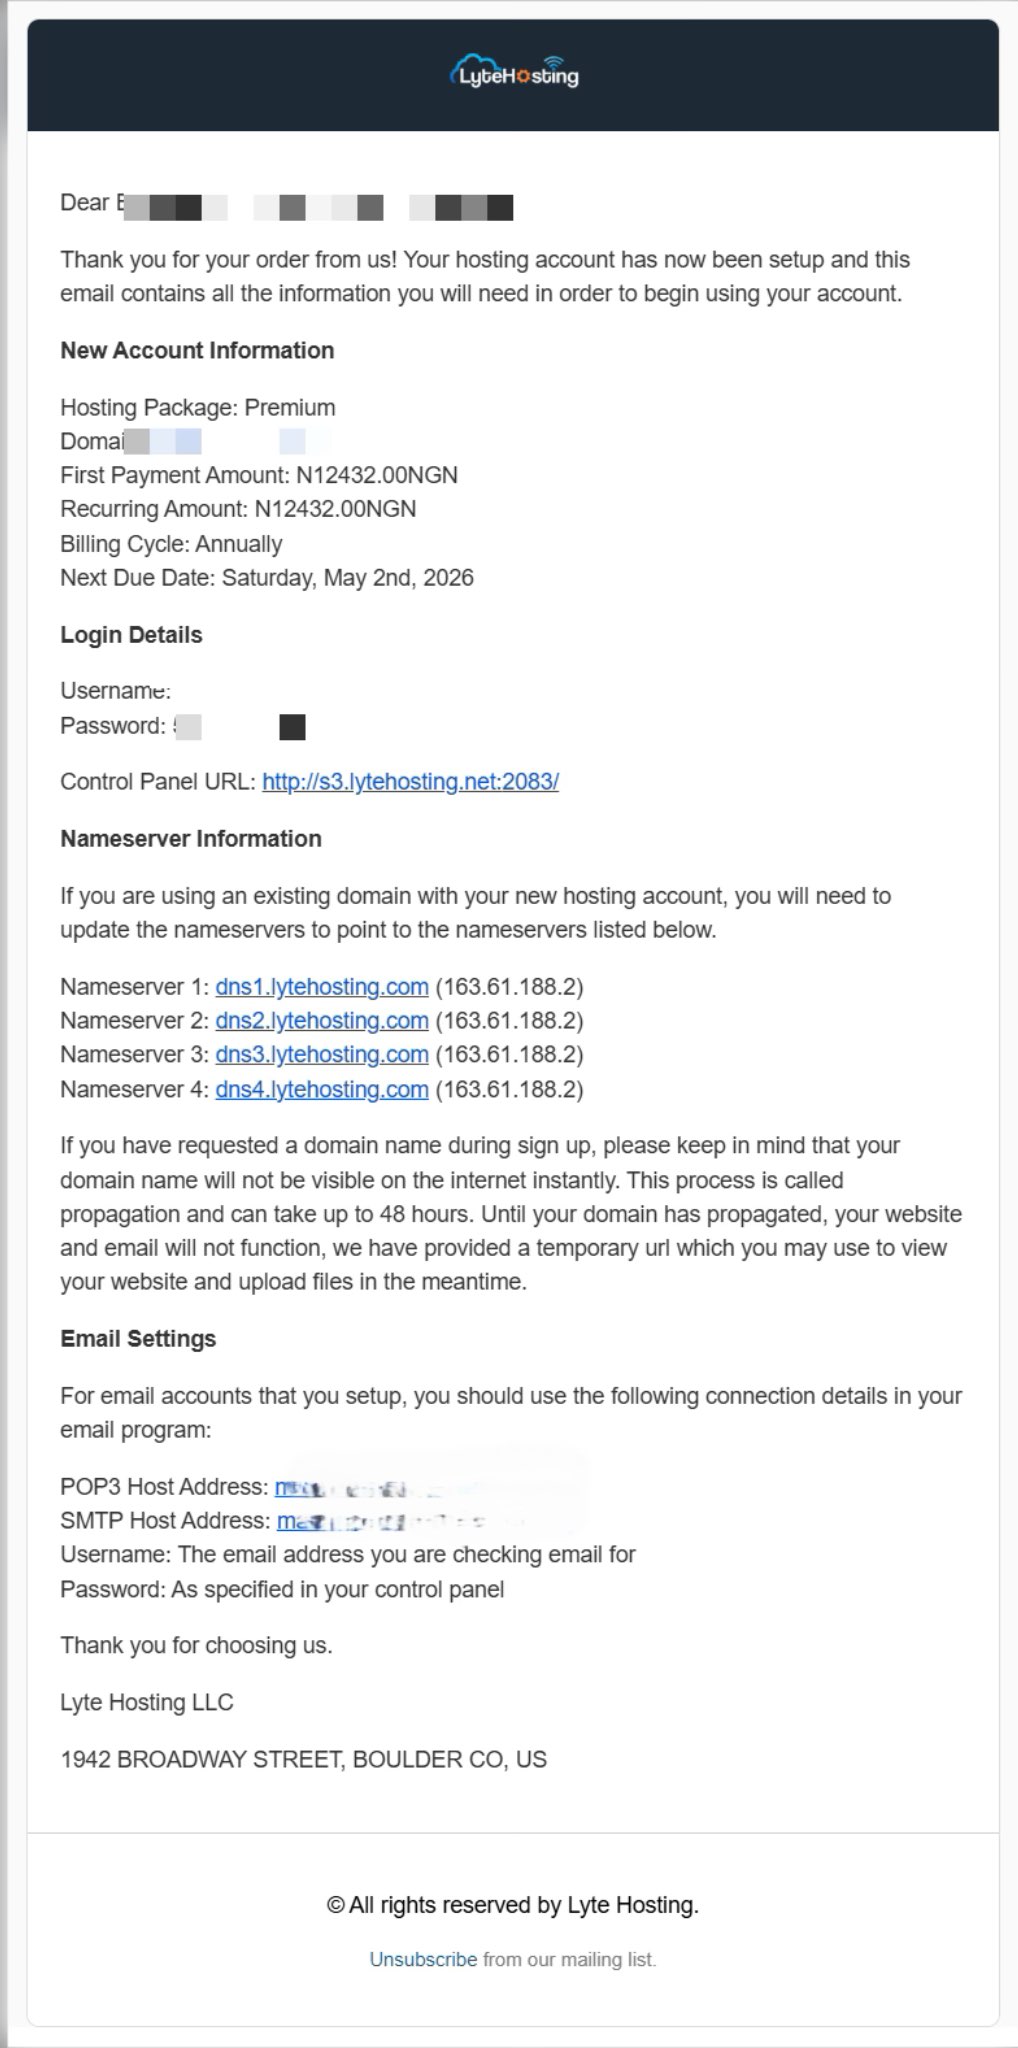
- Method 3: Log in using the details sent to your Email.
Through your Email;
- When you purchase a hosting plan, your cPanel login details (including username, password, and cPanel URL) are automatically sent to your registered email address. Simply check your inbox (or spam folder), locate the email, and use the provided credentials to access your cPanel.
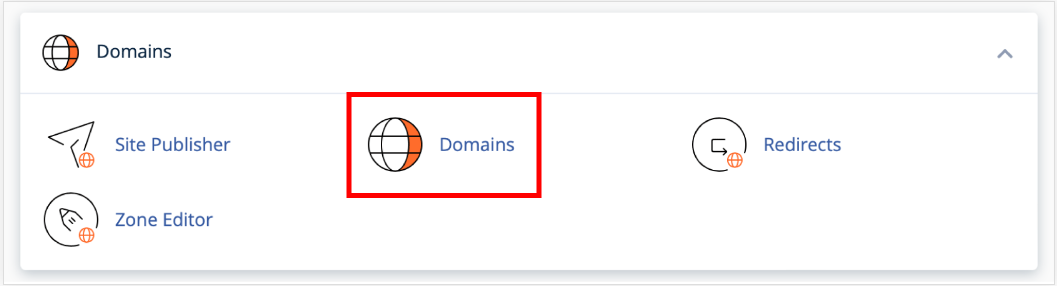
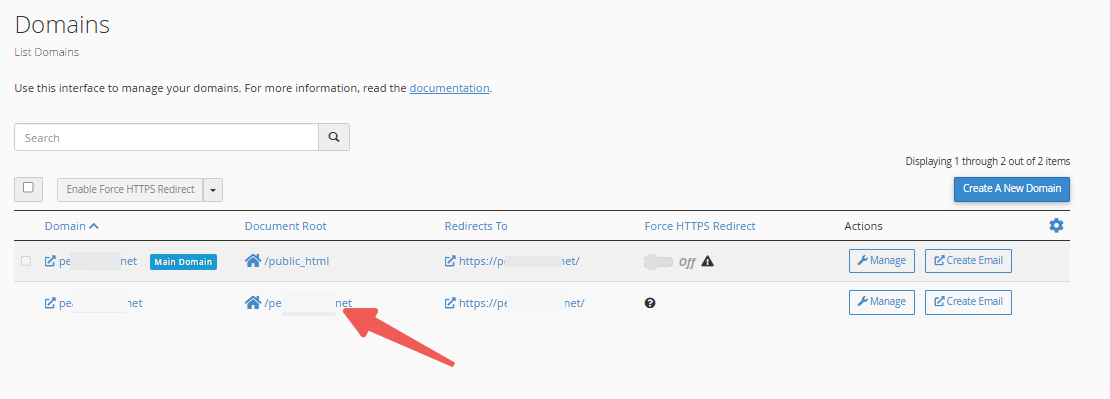
STEP 2: Locate the Domains section and click Domains.
STEP 3: Locate the addon domain where you want to create the phpinfo.php file.
STEP 4: Click on its document root.
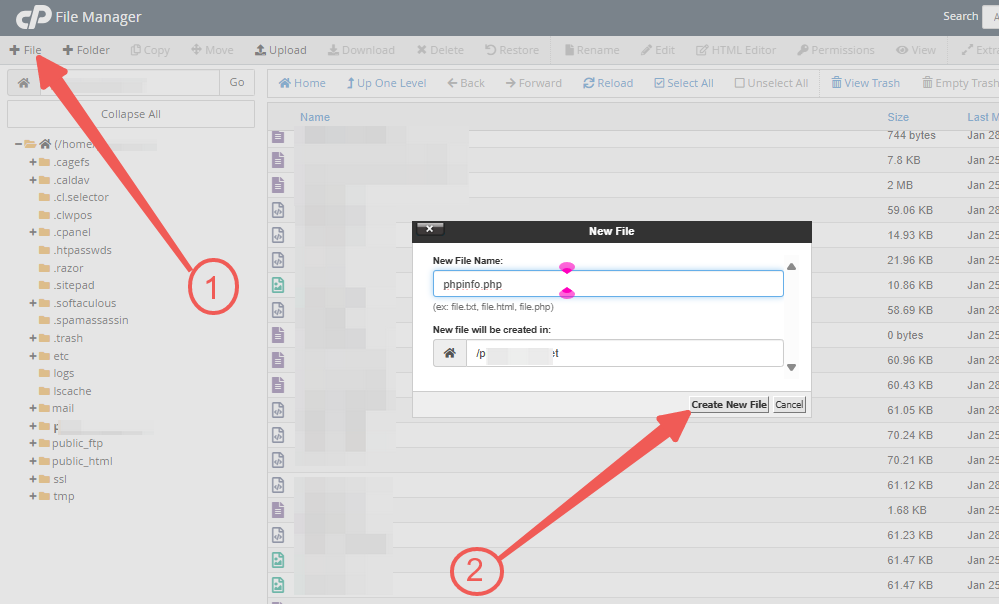
STEP 5: In the top-right menu, click + File to create a new file, and name it phpinfo.php.
STEP 6: Click Create New File.
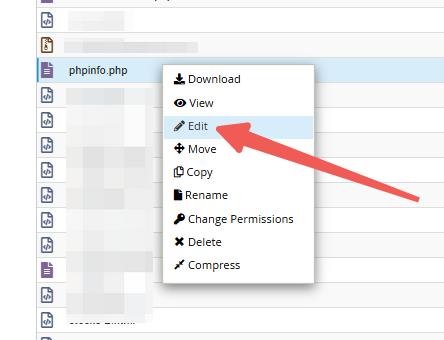
STEP 7: Right-click the phpinfo.php file and select Edit, then click Edit again.
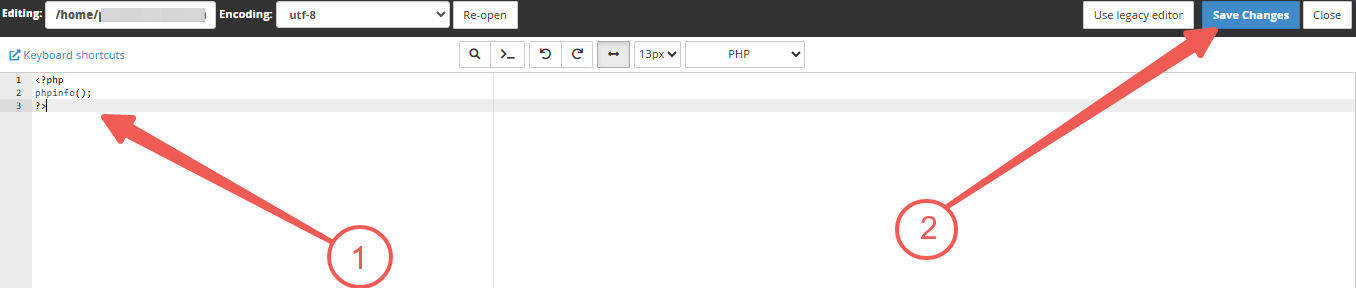
STEP 8: Paste the code provided below into the file.
<?phpphpinfo();?>
STEP 9: Once done, click Save Changes.
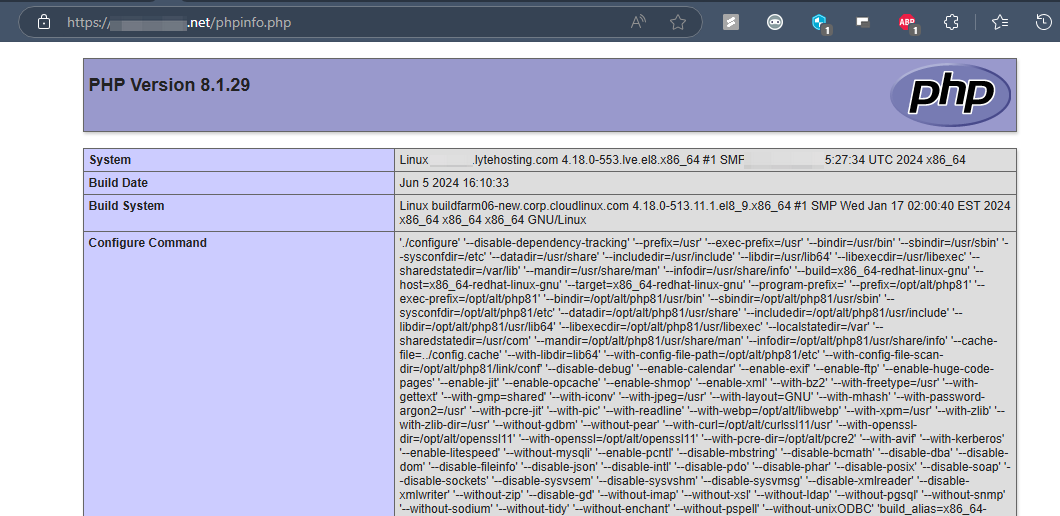
Checking PHP Information Using a Browser
You should have a phpinfo.php file in your addon directory by now. So, all that’s left is to access the file by adding /phpinfo.php at the end of your domain name.