Launching your website starts with the right foundation, and LyteHosting makes it incredibly easy. From choosing the perfect hosting plan to securing your domain name, the entire process is designed to be fast, affordable, and beginner-friendly. In just a few steps, you can set up reliable web hosting and take your website live without any complications.
STEP 1: Visit lytehosting.com.
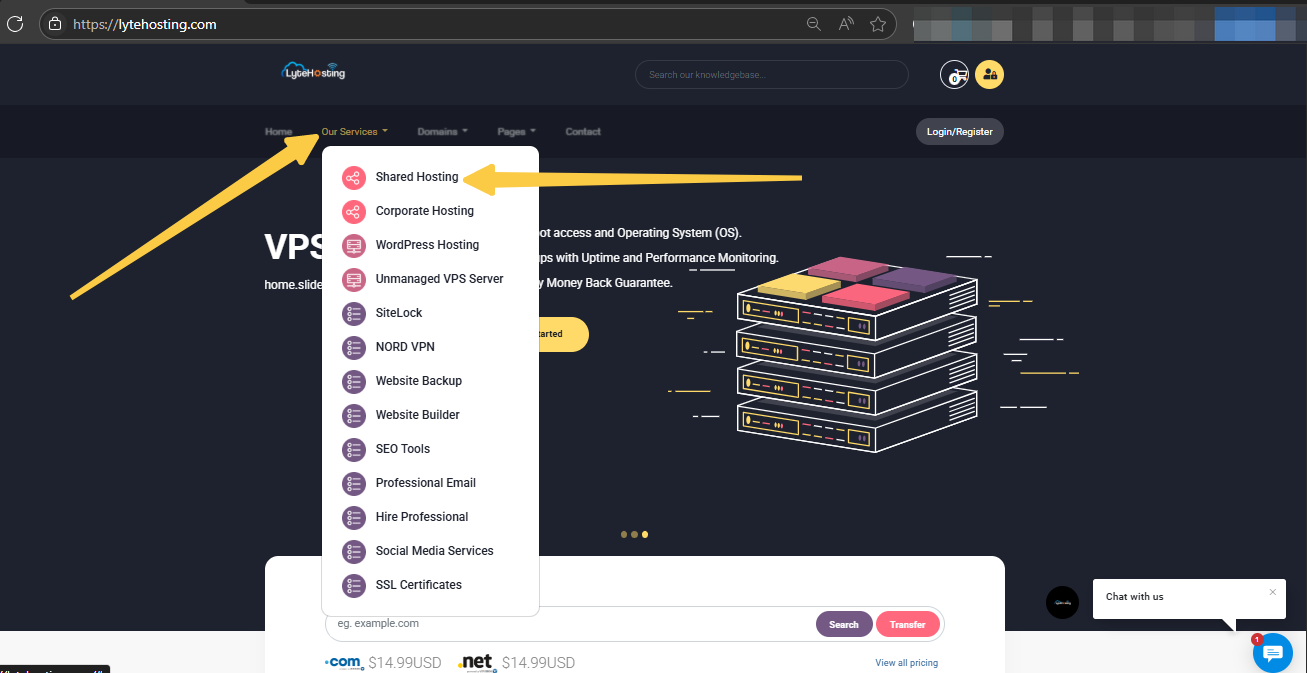
STEP 2: From the homepage, click on “Our Services” Explore the available hosting options, including shared hosting, corporate hosting, and more. Shared hosting is a great choice for beginners or growing websites.
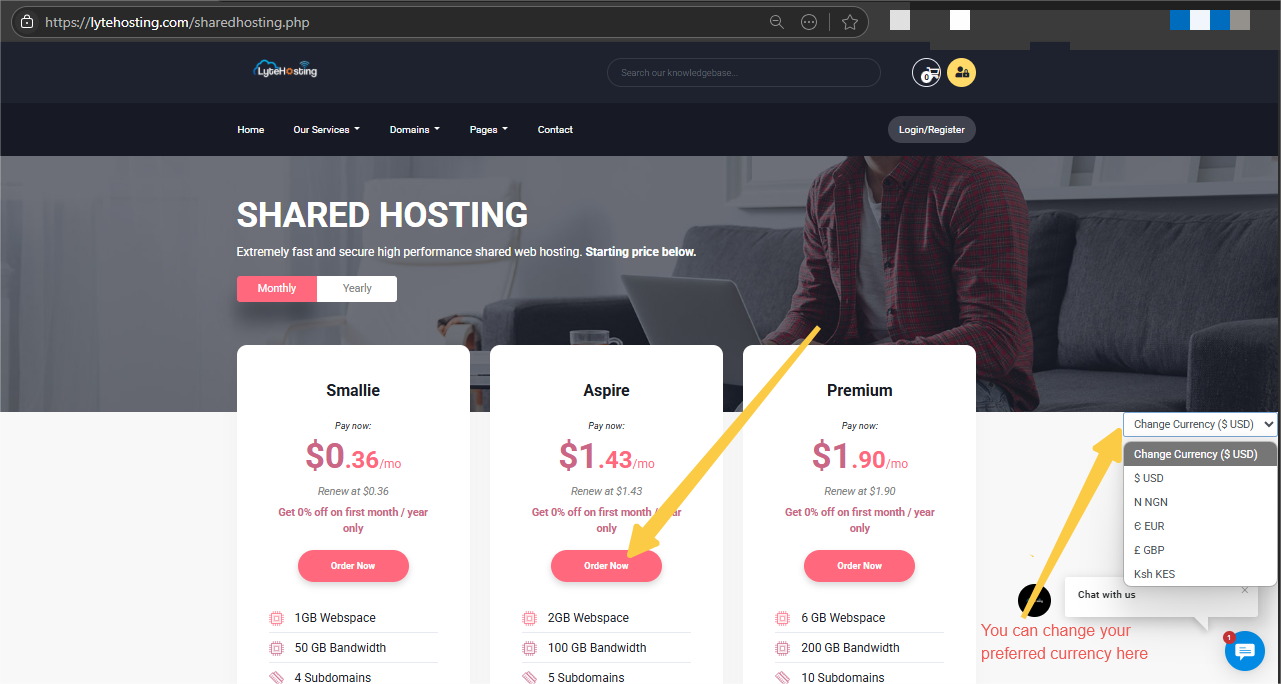
STEP 3: Select your preferred plan—e.g., the Aspire Plan—and click “Order Now” to proceed. You can also change your Preferred Currency.
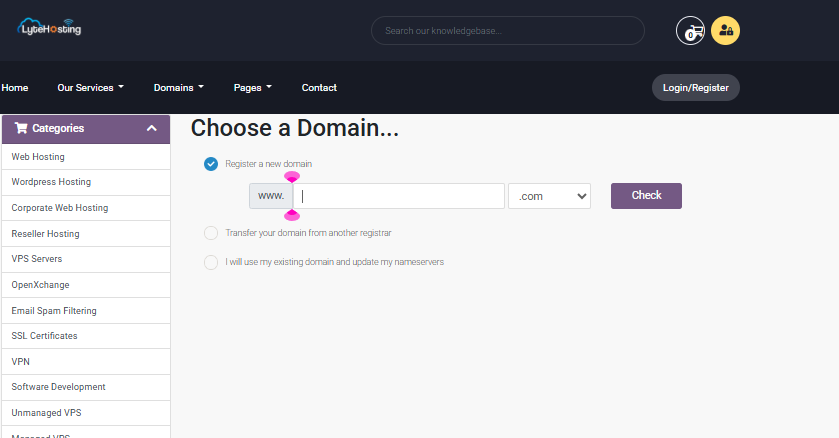
STEP 4: You will be prompted to choose one of the following options for your domain:
- Register a new domain: Perfect if you want a brand-new domain name.
- Transfer your domain from another registrar: Move your existing domain to LyteHosting.
- Use your existing domain: If you already own a domain and want to update nameservers.
Choose the option that fits your needs and continue.
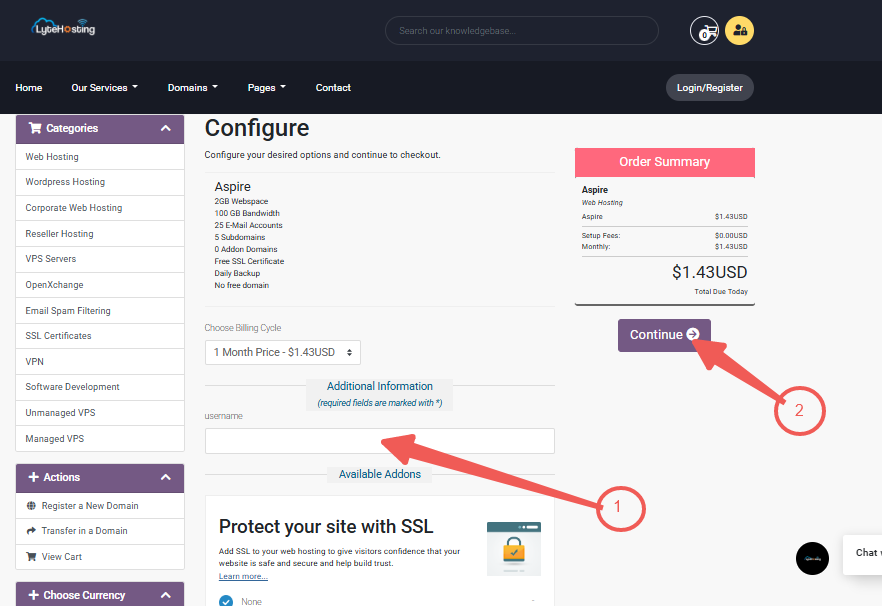
STEP 5: Choose your Billing Cycle and a username for your hosting account. There are also options for Available Addons, and hit Continue.
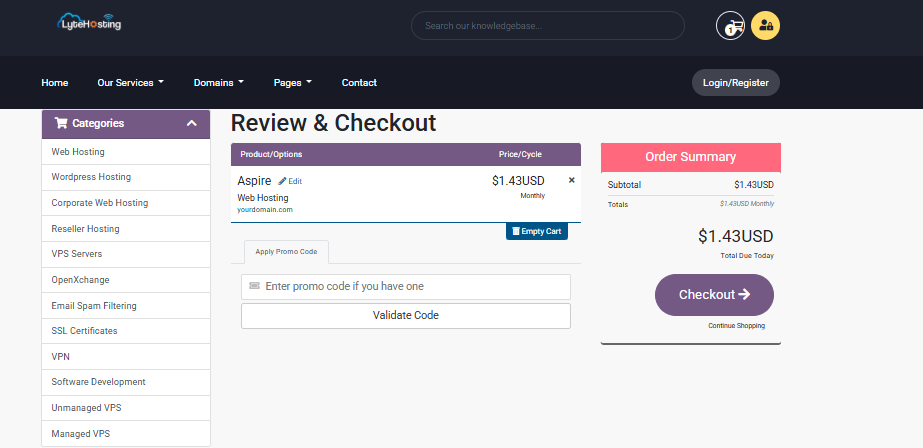
STEP 6: If you have a Promo Code, apply it to your order. Then proceed to Checkout.
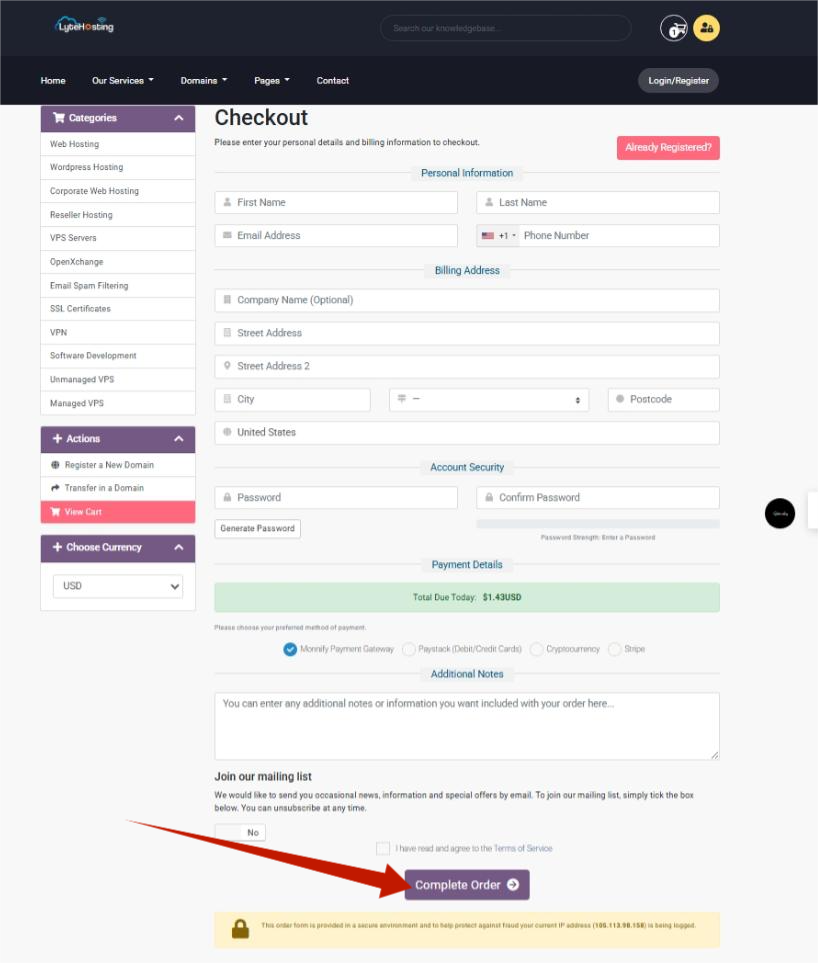
STEP 7: Fill your Personal Details and Billing Information into the fields. Click Complete Order, his process usually takes 10 to 15 seconds.
STEP 8: Once your order is processed, you’ll see an Order Confirmation page. Click Continue to Client Area to access your hosting dashboard.
STEP 9: In the Services section, locate your active hosting plan, and click “Login to cPanel” to manage your website files, domains, emails, and other settings.
Tips for a Smooth Experience
- Keep your account credit topped up to ensure auto-payments are seamless.
- Enable automatic backups to protect your website data.
- Use the client area to submit support tickets anytime you need assistance.


